
Your course is made up of content and activities. This section gives you direction on creating folders to store your content and adding content items into your course and its folders. There is also a helpful tool for uploading multiple files at the same time.
The Course Entry Point is the page where Blackboard will place people upon entry to your course. This must be a Blackoard-related menu item otherwise no one will have access to any Blackboard components of your course. You have the ability to set the Course Entry Point to any non-hidden, non-empty, menu item on the left hand menu.
Do not set the Course Entry to point an external URL or tool like Zoom, Qwickly Attendance, or Gradescope.
To set the Course Entry Point, use Customization, Teaching Style.
For more information, see Blackboard’s help on Course Entry point.
The Create Folder feature allows you to create folders within Content Areas to help organize course content. Folders make it easier for students to find documents by limiting the amount of scrolling they need to do and by labeling specific content areas. There are two main ways of using folders to organize your material; content-based and chronology-based. An example of content-based organization is creating a folder for all your lecture notes, another for readings, another for assignments, etc. A chronological or unit-based system would have a folder for each week or unit that contains the lecture notes, readings and assignments for that unit in one folder.
** PLEASE NOTE: Items must be uploaded into each folder. Although items (not folders) cannot be dragged and dropped from other areas of Blackboard, they can be copied or moved between areas or courses.
How to Organize Content in Blackboard
** PLEASE NOTE: We recommend NOT using the Lesson Plan or Learning Modules options on this page.
How to Reorder Folders on your Page
The Create Item feature allows you to add content to your course site. You can insert text and attach files. Files can be uploaded in their original format (such as .doc or .ppt documents) and when students click on the link created, the files are downloaded to the student’s computer. Depending on the user’s browser preferences, pdf’s will usually open directly in the browser. You can also deliver audio and small video files by attaching the file in Build Content/Item or Build Content/File (any media file greater than 300MB should be streamed using Panopto).Blackboard has a maximum file size for upload of 1 Gb, however it is strongly recommended that you keep files to 500 Mb or less.
Notes:
- If you only want to upload a file, without adding descriptive text, choose File from the Build Content menu (see image below), rather than item. It will simply create a link to the file you choose.How to Attach a File
- You can attach an image file, and the student will need to click to open the image. For images, using the Image option from the Build Content Menu will give you more options.
To create the same content items in multiple courses at once, see Qwickly Course Tools.
How to Reorder Content on your Page
How to Copy and Move Content on your Page
Blackboard has a maximum file size for upload of 1 Gb, however it is strongly recommended that you keep files to 500 Mb or less.
Notes about Special Characters
What kinds of documents can I upload to Blackboard?
A: You can upload just about any file type to Blackboard, however the type of document that you upload affects how your students can view it. If you upload documents that were created and saved in specific software programs (Word, PowerPoint, Excel, etc.), your students will have to have that particular software installed on their computer to view the documents.
Files that are in .html format will be viewable within the browser. Adobe .pdf files require that users have the Acrobat Reader program, but it’s free and nearly universal.
Media files such as mpeg, mov, avi, wav, aiff, and mp3 require appropriate plug-ins such as Quicktime and Windows Media Player.
Creating and Checking Web Links
You may want to link to an external site from within Blackboard. For example, the libraries provides access to journals, articles, streaming digital media, films and videos that can be linked directly to a Blackboard course page. Information about Course Reserves is found at
- River Campus Libraries: https://www.library.rochester.edu/services/course-reserves-faculty
- Miner Library: https://www.urmc.rochester.edu/libraries/miner/teaching-and-learning/course-reserve-guide.aspx
- Sibley Music Library: https://www.esm.rochester.edu/facultystaff/handbook/reservedesk/
Upon receiving your links, use the instructions below to add them into your Blackboard course.
Create a Web Link to an External_Site
Check Web Links across multiple courses at once using Qwickly Course Tools
Creating Content Items in Multiple Courses at Once
You can use Qwickly Course Tools to populate multiple courses at once with the same content item.
Upload/Download Multiple Files
Uploading Multiple Files
There are two ways to upload multiple files:
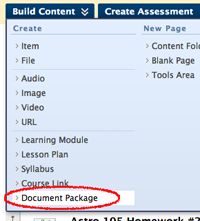
- Using the Document Package tool under Build Content in a content area
- Using the Upload Package option in the Course files folder
The Document Package tool will unzip the files directly in the content area you’re in, making an item of each file. You can then re-order them as necessary
The Upload Package tool from the Course Files folder will unzip the files into the Course Files folder. You will then need to link them or attach them within the course framework, by creating an Item or File in the Build Content menu, or attaching to a forum post, or an assignment.
Document Package Upload
First, on your local computer, select the files you want to upload and zip them together into a zip archive.
In your course, enter the Content Area folder where you want to place the files.
1. From the Build Content menu, choose Document Package
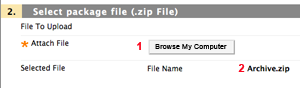
2. On the next screen, navigate to your zip file and select it for upload
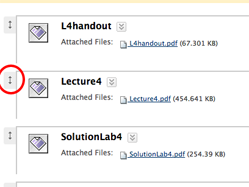
3. Click Submit. The files will be unzipped and appear as individual items in the Content Area. You can rearrange the order as needed using the arrows to the left of each item.
Upload Package to Course Files
1. First, on your local computer, select the files you want to upload and zip them together into a zip archive.
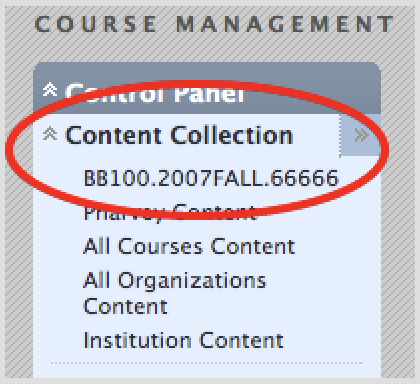
From within your course, under Control Panel, expand the Content Collection and click on the first item, which is your Course ID
This will open a screen to the Course Files for the current course.
2. From the Upload button, choose Upload Package
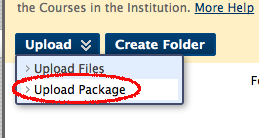
3. Browse for and select your zip file:

The zip file will decompress and list the files in the Course Files folder.
** Tip: If you want to keep a set of files within a folder, first choose Create Folder, then enter that folder before using Upload Package.
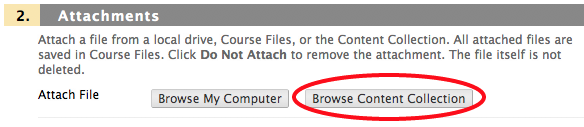
4. In order for any of these files to be accessible to students, you will add them as items or files to a Content Area, or attach them to an assignment or discussion post, or any tool that allows attachments. When you attach the file you will Browse Content Collection instead of Browse Local Computer.
Downloading Multiple Files
You can easily download multiple files from the Course Files area.
1. From within your course, under Control Panel, expand the Content Collection and click on the first item, which is your Course ID
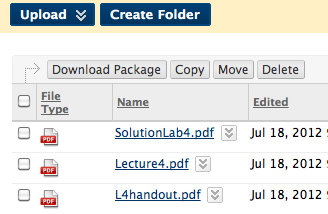
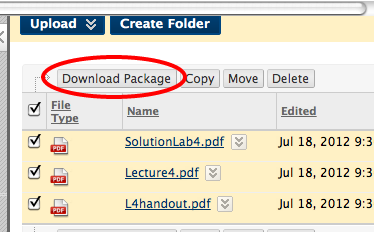
2. Tick the checkbox of the files you want to download
**Tip: Clicking the check box to the left of File Type will select all files
3. Click Download Package
The zip file will automatically download to your desktop or downloads folder, or wherever you have designated for downloaded files in your browser.