Qwickly Attendance within Blackboard offers the ability to take attendance either manually, through a student check-in, through a card swipe, or through designated Blackboard course activity.
Introduction to Qwickly Attendance
Qwickly Attendance has been designed to be powerful, yet straightforward.
1. Add Qwickly Attendance to your Course:
In Original, you can add Qwickly Attendance to your Course Menu, or in a Content Area. The course menu creates an easy access point for both faculty and students to take attendance and view attendance records. (The student view of attendance allows students to see only their own attendance record and provides the link to check in, when a faculty member chooses to use student check in).
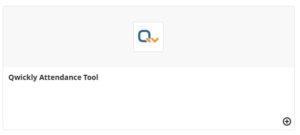
In Ultra, you can add Qwickly Attendance by clicking the + in your content area, choosing the Content Market and then choosing the + on the Qwickly Attendance Tool card.
2. Set Up Qwickly Attendance for the first time when using it in each course: The first time you visit the tool in a course, you’ll need to complete the settings for the course. This can be as simple as clicking submit to accept the default settings. If you need to make changes later, you can visit the settings screen at any time. You will not be able to take attendance in a course until this set up is complete. See information below on Settings.
3. Start taking attendance: After your initial set up in the course, you will be automatically taken to the attendance taking screen when you visit Qwickly Attendance. Qwickly Attendance offers multiple ways to take attendance. You can take attendance with a student list, a card reader, or allow students to check in on their own computer.
Note: The first time you launch attendance may take longer than normal as your student roster has to be loaded into the cloud (ie. classes of 100 students may take 10 seconds, classes of 200 students may take 20 seconds, classes of 400 student may take 40 seconds). Additionally, closing an attendance session may take longer than expected in order to store the information in the cloud, especially if your class size is large (ie. classes of 200 students take about 15 seconds, classes of 400 students take 25 about seconds).
Note: The first time you click your Qwickly Attendance tool, you will be required to allow Qwickly access to your course in Blackboard, You will see a permissions screen as shown below. Click Allow to continue.

Note: You must be an instructor or teaching assistant in the course in order to set up Qwickly Attendance, or to Take Attendance. Students who use the link will see their attendance record. Course builders (or other roles in Blackboard) will not have access to any information.
Instructor Guide: Getting Started with Qwickly Attendance
Features and Services
Add the Qwickly Attendance Tool to your Course Menu (Original only)
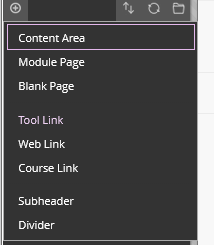
Click the + sign in the top left of the menu to add a new item
Choose Tool Link
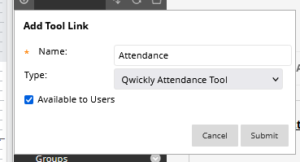
Choose the Qwickly Attendance Tool, provide a name, make available to users, and click Submit
The new item will appear at the bottom of the menu – rearrange if desired.
Click the new link that is created to access Qwickly Attendance and Customize the Settings.
Add the Qwickly Attendance Tool to a Content Area (Original)
Create a Content Area in Blackboard
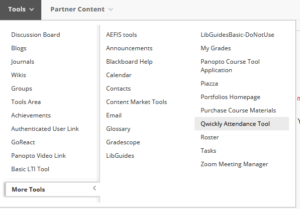
Within that Content Area, use the Tools menu and choose More Tools, and then Qwickly Attendance
Fill in the web form with a name and any instructions.
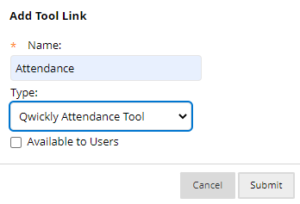
Click the new link that is created to access Qwickly Attendance and Customize the Settings.
Add the Qwickly Attendance Tool to the Content Area (Ultra)
In the course content area, click on the plus sign where you want the tool to appear.
![]()
Choose Content Market.
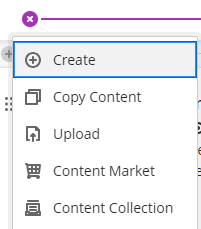
In the content market, to add the tool scroll until you find it and then click on the plus sign in the bottom right-hand corner. This will add it to the Content page.
Click the new link that is created to access Qwickly Attendance and Customize the Settings.
Scheduling Sessions in Advance
What a Student Sees in Qwickly Attendance
Watch: Take Attendance Manually – List Mode
Watch: Take Attendance Manually – One by One
How to Use Student Check-In
Watch: Student Check-In
Watch: Card Reader Mode
How to Use Card Reader Attendance with Multiple Devices
Location Context for Manual and Check-In Modes
Taking Attendance by Groups or Sections
Note: Groups are relevant when your course has Blackboard Groups created. Attendance can be taken for an individual group (versus the entire roster).
Note: Sections are relevant when you have asked for multiple Blackboard courses to be merged. Attendance can be taken for just students registered for an individual section; however the names of the course shells must be unique for this to work in Check-in or card reader mode. This is not usually the case so the instructor must modify the names of the shell courses that are merged.
New: QR Check-in via the Qwickly Attendance Mobile App
Please note that all students must check in using a mobile app when using this method and success may be dependent upon the quality of their camera and their ability to view the projection at the appropriate angle and distance.
Watch: QR Check-in Mode
The Qwickly Mobile App for QR Check-In
Launch the app.
To Log in:
Search for Rochester – the University of Rochester should appear. Select it.
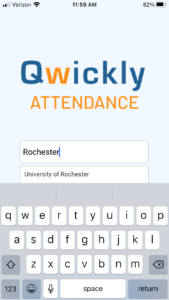
Click Sign In.
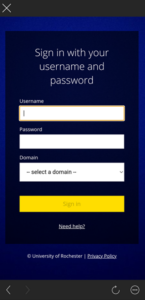
On the login screen, choose the yellow Login with UR/URMC Active Directory
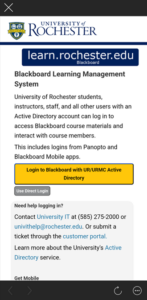
Login with your Active Directory credentials. Be sure to choose the domain (UR or URMC). Duo is required for off-campus access.
