Step 1
Log in to your Box account online using the the computer you wish to store your files on.
If you have already downloaded Box Sync, skip to Step 4.
Step 2
Go to your profile in the upper right corner and click apps.
Step 3
Search for Box Sync and download it following the Box Sync Installation tutorial.
Step 4
From your main “All Files and Folders” page online, designate Sync Folder to Desktop for each folder you wish to save.
Step by step instructions for syncing folders provided by Box.
Step 5
You must now copy your files from the Box Sync folder to your desktop.
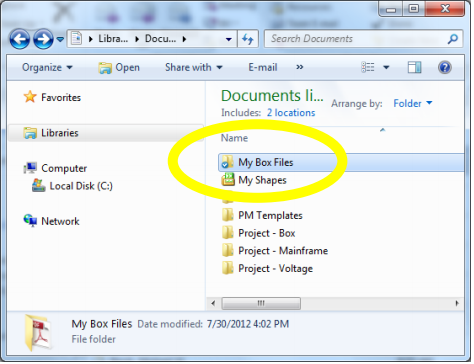
View your computer Document library that contains your personal files and folders and locate a folder titled My Box Files.
Step 6
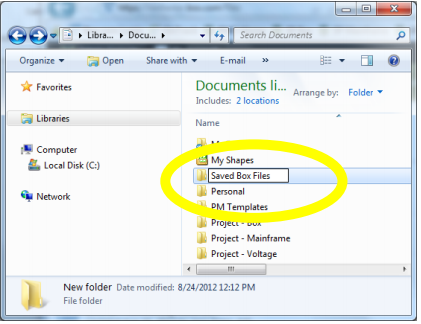
Create a new Folder named “Saved Box Files”. (Note: Be sure this is not a subfolder of the “My Box File” Folder).
Step 7
Copy the files from the My Box Files folder to the Saved Box Files folder.
You can do this in a number of ways but the next few steps demonstrate how to do this by copying and pasting the files.
Step 8
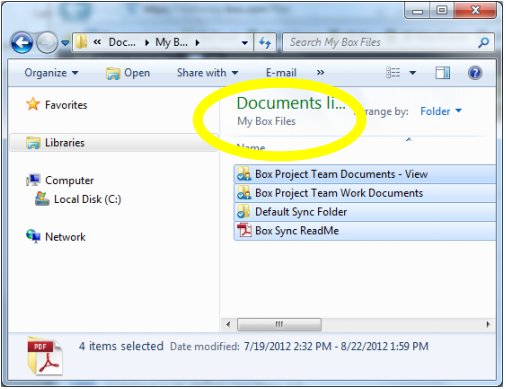
Open the My Box Files folder. Select all files, right click and select copy.
Step 9
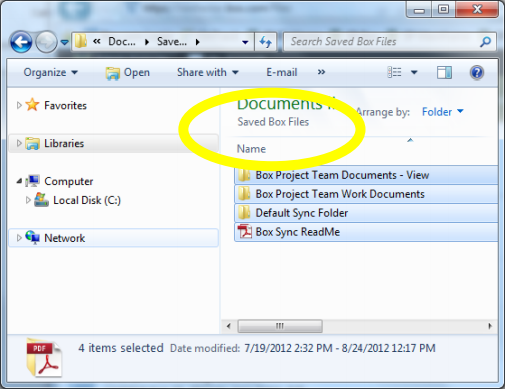
Open your Save Box Files folder and right-click select Paste to place all files and folders.
Step 10
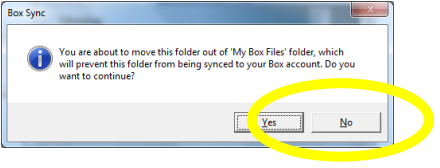
If you receive an error message like the one below, you have MOVED or CUT your files from the “My Box Files” folder. This will delete the files from the Box Application. Click “No” if you want to leave them in Box.
Step 11
Log back into Box online and remove the Sync option for each file and folder by selecting Disable Sync for This Folder on each item’s menu.
This will ensure you do not have multiple copies on your desktop.

Step 12
Your contents are now saved to your desktop and your Box account can be terminated. Coordinate with your Group Admin to delete your account.