In Ultra courses, there is only ONE Content area. Within the Content area, you can place any items, or you can use Learning Modules or Folders for organization of content.
Note: You can only go two deep with folders and learning modules in an Ultra course. You can have as many folder within the top level as you like. This may require that you think about the organization of your course materials differently.
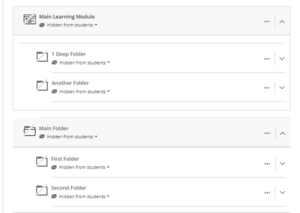
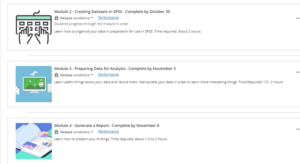
Learning Modules allow students to navigate through the materials within them more easily by offering a paging structure. Folders do not have this feature. Additionally, Learning Modules allow you to add imagery to the main page associated with the module. For this reason, we recommend that your main, top-level containers be Learning Modules.
Organize your Content in Learning Modules or Folders
To create either a learning module or a folder, start by clicking on the + sign where you want the module or folder to appear in your course.
![]()
On the menu, choose Create
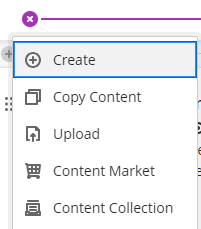
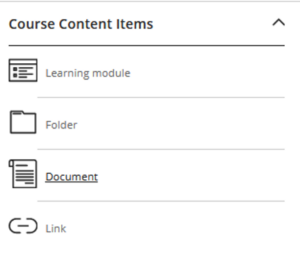
Then choose either Learning Module or Folder from the menu.
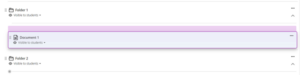
Move Content within your Course
To move documents and other items, click on the six dots ![]() and then move the item to where you want it.
and then move the item to where you want it.
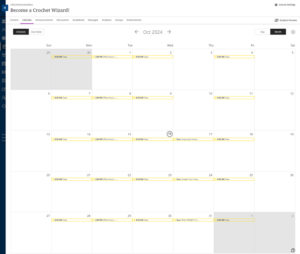
The Calendar is an integral piece of your Ultra course. Course items with due dates automatically appear on the Blackboard Learn calendar. If you change a due date, the calendar gets updated as well. On the flip side, moving a calendar item by “drag and drop” simultaneously changes a due date. The calendar view within the course will only show items associated with the course. You can select Schedule Views (month or day) or see only Due Dates.
Note: If you are still using Original courses, you will find documentation below.
Set/Change the Course Homepage (Original)
You can change the “homepage” or entry point of your course so that your preferred Course Menu item is the opening page:
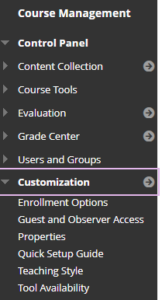
1. From the Control Panel, use the Customization menu to choose “Teaching Style.”
2. Choose the Course Menu item you want to be the landing page for the course
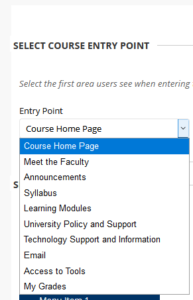
3. Click Submit.
Modify Your Course Menu (Original)
In Blackboard Original, Instructors can customize their Blackboard course navigation menu by clicking on the “+”. Instructors can create a navigation menu specifically for each course with titles and functions of their choice. This feature creates additional content areas and adds tool functions to the navigation menu. Instructors can also rename any of the navigation buttons/links.
Any time you want to make changes to your Blackboard course, be sure that Edit Mode is turned on. The button will be located near the top right of your screen. Toggling the Edit Mode to “Off” will give you a student view. 
Click the chevron to the right of any menu item to see the options for that item.
Click the double-headed arrow to the left of any menu item to drag-and-drop it to a new location.
Click the plus sign to the left of the course title for options to add content areas or links.
Click the “Edit Mode” switch to “Off” when you are done to see how this looks to students.
For more detailed information:
Using the Blackboard Calendar (Original)
The Blackboard Learn calendar allows personalization and customization. You can select views (month, week, day) and color-code the events to differentiate courses and personal items, and set recurring events. Course items with due dates automatically appear on the Blackboard Learn calendar. If an instructor changes a due date, the calendar gets updated as well. On the flip side (for an instructor), moving a calendar item by “drag and drop” simultaneously changes a due date.
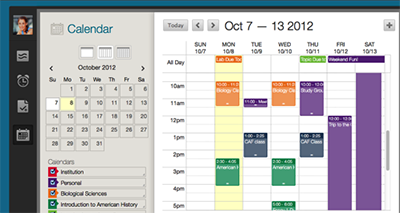
Calendar events may be color coded and viewed all at once:
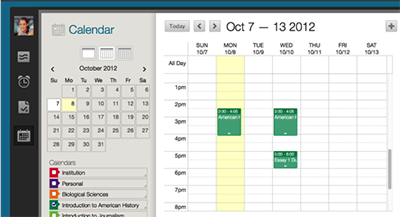
or filtered to show only the desired mix of class and personal events. Users can select which calendars to view, ranging from personal to institution to individual course listings.
More on the Calendar tool
Using the Calendar tool:
- Using the Calendar tool – Instructors (includes a demonstration video (3m. 12 sec.)
- Using the Calendar tool – Students
The Create Folder feature allows you to create folders within Content Areas to help organize course content. Folders make it easier for students to find documents by limiting the amount of scrolling they need to do and by labeling specific content areas. There are two main ways of using folders to organize your material; content-based and chronology-based. An example of content-based organization is creating a folder for all your lecture notes, another for readings, another for assignments, etc. A chronological or unit-based system would have a folder for each week or unit that contains the lecture notes, readings and assignments for that unit in one folder.
** PLEASE NOTE: Items must be uploaded into each folder. Although items (not folders) cannot be dragged and dropped from other areas of Blackboard, they can be copied or moved between areas or courses.
1. Click on desired Content Area from the Course Menu.
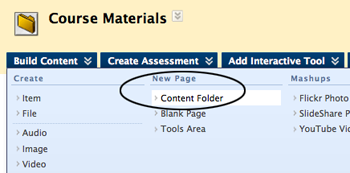
2. Click or hover on the Build Content button, and from the flyout menu, choose New Content Folder, under the New Page column.
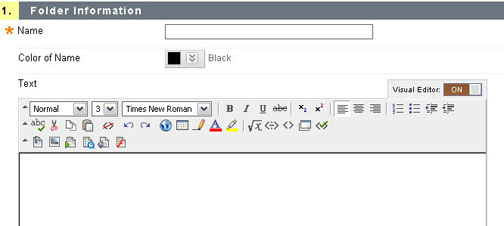
3. Enter a name for the folder into the Name field.
4. Type a description of the folder contents into the Text field.
** PLEASE NOTE:this is just a folder description that appears next to the folder in the Content Area. In order to add content within the folder, click the link to the folder in the Content Area, then use the Create Item and Build buttons to add content.
5. Scroll down to the bottom of the page and click the Submit button.
Move Content Between Folders (Original)
You can copy or move items between folders in your course, or even between your courses. This only works for certain types of items (e.g., text items, files, and discussion forums). It does not work with items that have a connection to the Grade Center, such as assignments, tests, and surveys.
To move an item to another folder:
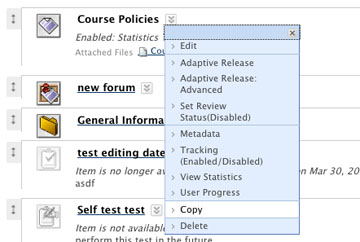
1. Using the contextual dropdown next to the item, select Copy.
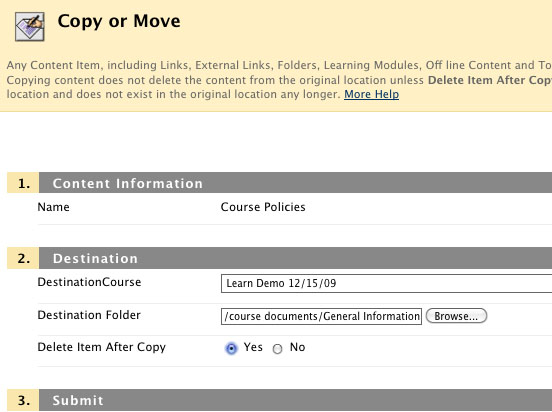
2. On the next screen, the current course will automatically be selected. If you want to copy the item to another course, choose that course from the pulldown list.
3. Browse to choose the destination folder.
4. If you want to move the item, rather than just copy it, click Yes on “Delete Item After Copy.
More Information
Q: Can I change the order of my folders?
A: Yes, click and drag the arrow to the left of the folder name.
Q: Can I add folders in other folders?
A: Yes, once inside a folder you can choose to add additional folders or any other type of content available in Blackboard.