Secure-Print
Secure-Print is a generic print queue that allows you to send a document to be released on any PaperCut printer.
Secure-Print is installed by default after you sign in to PaperCut Print Deploy. It is preinstalled on managed computers and available for user install on personal devices at https://print2.rochester.edu. (You must be on the University network to access.) Tutorial
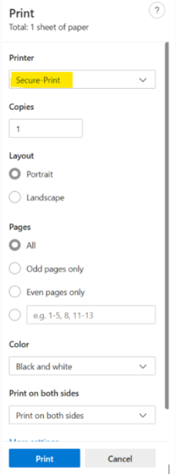
As shown in the first screenshot below, you have the ability to set basic print options (color, double-sided printing, etc.).
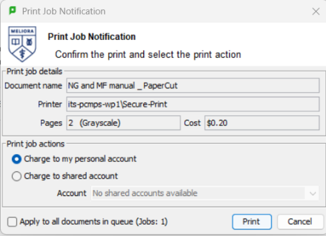
Secure-Print will provide a basic list of settings, such as color or black and white, paper orientation, and print on both sides. **When you choose to print, a pop-up window will confirm print options as well as billing options, if applicable (second screenshot).
- When printing from any application (File menu > Print), choose Secure-Print as your printer.
2. Only when on public computers, you will see a confirmation of your selections and be offered an account selection. If you will be charging the print job to a shared account, the you can choose Charge to a shared account and select the applicable assigned account from the drop-down menu. Note: The account cannot be changed at the printer.
Visitor Queues
Visitor queues will be available on public University computers. Visitor queues can be used by:
- those with Visitor Print & Copy Cards or Rocky Bucks cards
- those who are printing from a device with a shared login account
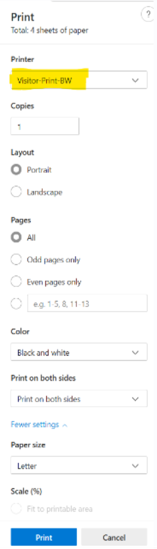
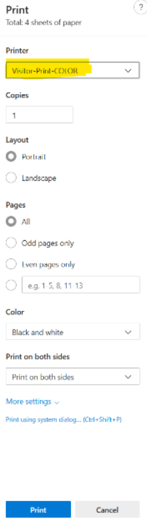
There are 2 visitor queues, Visitor-Print-Color for color printing, and Visitor-Print-BW, which will convert jobs to black and white. Visitor queues give only basic print options (no advanced finishing features such as stapling, hole punching, etc.).
Visitors printing to PaperCut should use a public lab computer that is configured for visitor printing.
1. When printing from any application, choose a Printer Visitor-Print-Color or Visitor-Print-BW, as applicable.
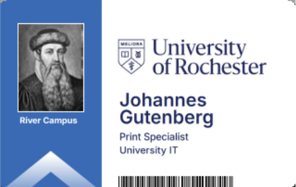
2. When a job gets sent to the visitor queue, you will need to enter either a Visitor Card Number (if charging to a visitor card) or your URID (to charge to your personal account or to an FAO, if available to you).
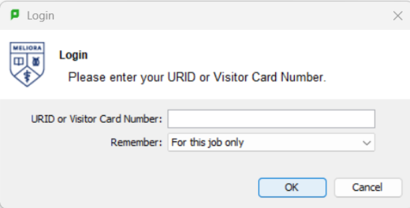
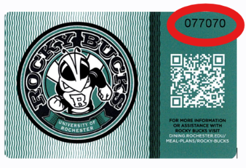
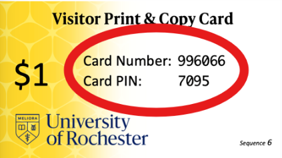
3. After a valid Visitor Card Number or URID is entered, you will be prompted to confirm your selections. If you will be charging the print job to a shared account, you can choose Charge to a shared account and select the applicable account from the drop-down menu. Note: The account cannot be changed at the printer.
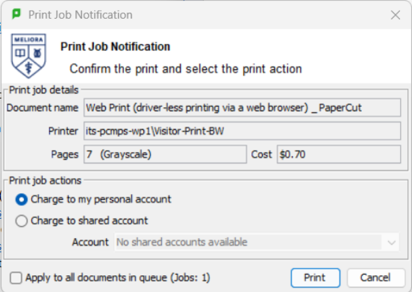
4. At the printer, enter your Visitor Card Number and PIN, or swipe your Rocky Bucks card, or swipe your URochester ID badge, as applicable. Select your job(s) and release. Tutorial
Secure-Print-Toshiba and Secure-Print-Xerox
The Secure-Print-Toshiba and Secure-Print-Xerox print queues are available if you require advanced finishing features on larger models with finishers. These print queues require that the you release your document on a printer that matches the queue name (Xerox or Toshiba).
1. When printing from any application, choose either ‘Secure-Print-Xerox or Secure-Print-Toshiba depending on your desired printer option. Note: These print queues are intended to be for brand-specific print options. If using these queues, the you must release your document from a printer that matches the queue name (Xerox or Toshiba).
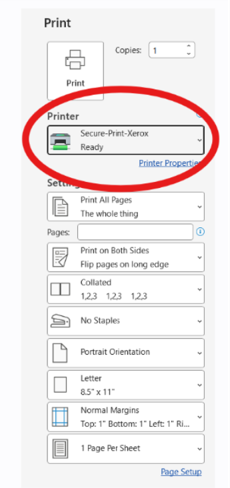
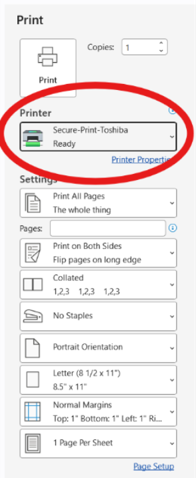
2. Once the printer is selected, you can click Printer Properties for more advanced options.
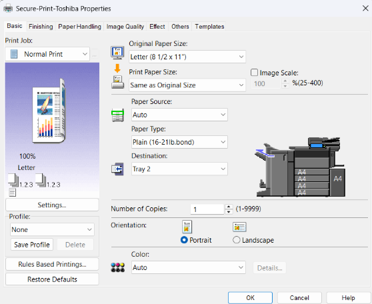
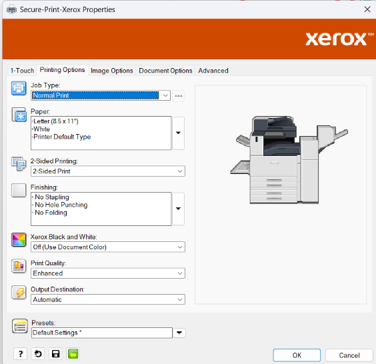
3. After finishing options are selected, you can select Print.
4. You will then be prompted to confirm your selections. If you will be charging the print job to a shared account, you can choose Charge to a shared account and select the applicable account from the drop-down menu.
Note: The account cannot be changed at the printer.
5. At the printer, log in, select your job(s) and release. Tutorial