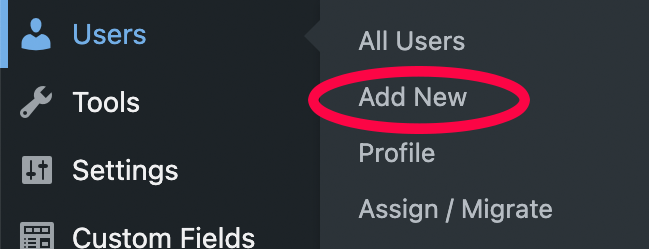
Step 1: Navigate to menu item
From the WordPress dashboard, navigate to “Users > Add New”
Step 2: Fill in username
The user’s username must be their NETID.

Step 3: Fill in email as official UR email
Email should be input as official UR email.
![]()
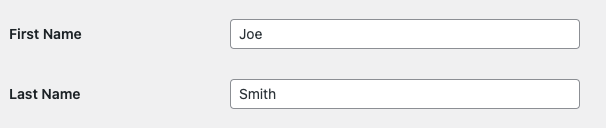
Step 4: Fill in first and last name
Step 5: Generate a password
The user’s NETID password will be used, however a good password must be created because both will technically work.

Step 6: Un-check "Send User Notification"
Un-check this box and notify user of their account manually. If this box is left checked then the user will receive an auto-generated email informing them to use a password other than their NETID.

Step 7: Select a role
The two most common roles are Editor and Administrator. For a complete list of roles and their descriptions, see official WordPress documentation on roles.

Step 8: Add new user and inform
Select the “Add New User” button. Inform the user they can at your site URL + “/wp-login.php”. For example: https://tech.rochester.edu/wp-login.php.