In Planner, labels can help you quickly see certain things that several tasks have in common, like requirements, locations, dependencies, or important time constraints.
Step 1
On the task board within the Planner app, select a task to open details.
Step 2
On the card, select Add label, and then select a label from the list. To rename a label you’ve chosen, select its name and type a new one, or rename one in the a list by selecting the pencil to edit.
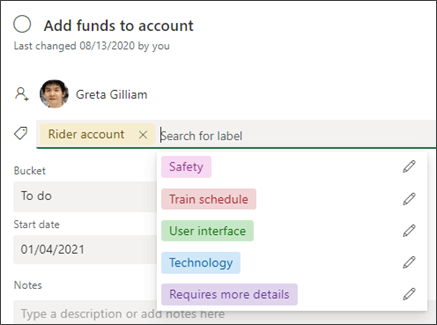
Once you’ve defined labels on one task, they’re available to all tasks in the plan.
For example, you can define the pink label as “Safety” on the “Add funds to account” task, and then set that same flag on every other task in your plan that is related to safety.