If you are using SharePoint to manage files, you may want to migrate your data to Box. Follow these instructions to transfer your files to Box from Sharepoint online.
Part 1
Setting up Box Drive
Download the Box Drive Installer
Download the Box Drive Installer.
Step 2
Follow the directions on the Box Drive installer to complete installation.
Step 3
Open Box Drive and click “Log In”
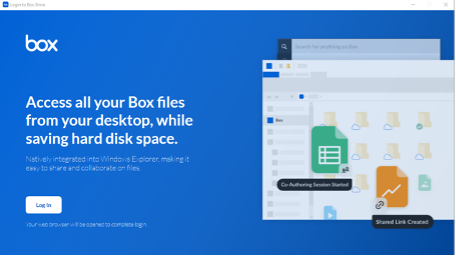
This will open a browser window/tab.
Step 4
Input your email address and click next.
If prompted, select NetID then log in as normal.

Step 5
After logging in, you’ll land on the following page:

Once Box Drive launches and you confirm that it’s logged in properly, you may close this tab.
Part 2
Syncing SharePoint folders to OneDrive
Step 1
In SharePoint for the Web, navigate to the site you want to copy to or from.
Step 2
Find the folder you want to add and click the circle in the folder’s tile to select it.
Step 3
Select Add shortcut to My files. If you don’t select a specific folder, it will sync the library or folder you are currently in.
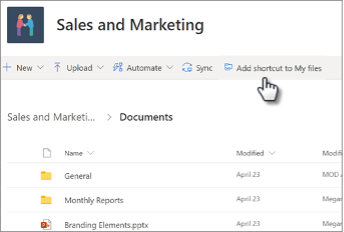
Alternatively, you can right-click the folder, and then select Add shortcut to My files.
Step 4
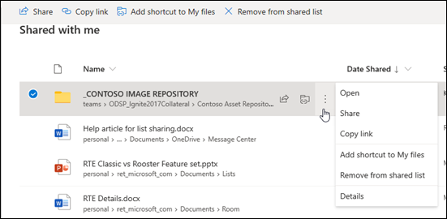
The folder will appear under your OneDrive in your file explorer. The icon will have a link symbol on it, as seen here:

Part 3
Move the files
Step 1
In File Explorer, open two windows. In one, select the Box folder you want as a destination and in the other select the SharePoint folder from which you want to transfer.

Step 2
Drag the files from SharePoint to Box (Or vice versa). This will copy the files over, you can then delete the original files if you so choose.