Page Contents
Overview
You have the option to add multiple bank accounts for use in different Student Payment Elections. When adding additional bank accounts, you will not be asked to select a “Preferred Payment” method, and you will not receive a new ACH Authorization form until you edit your Student Payment Elections as outlined in the Edit Student Payment Elections section below. The following steps outline how to add additional bank accounts after adding your initial bank account, and how to edit student payment elections to use the newly added bank account(s).
If you have not set up your initial student payment elections, you can do so HERE.
IMPORTANT: Additional bank accounts must be with US BANKS ONLY! For foreign bank payments, see “International Payments” on the Bursar website.
Do NOT use a payment card number in lieu of a bank account number. If you wish to make a payment via payment card, see How to Pay by Payment Card.

Add a New Bank Account
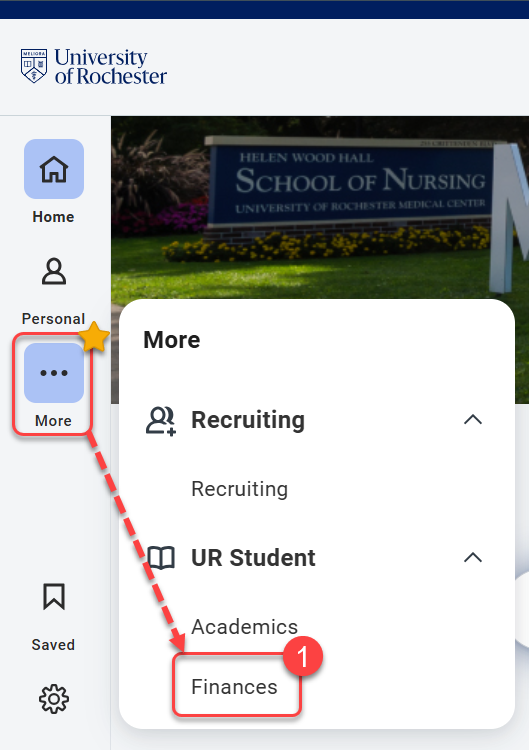
- Navigate to the sidebar on the left, hover over UR Student, then select the Finances app under UR Student. If UR Student is not visible, select the “More” icon.
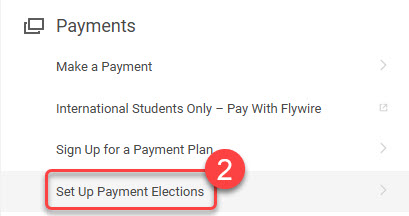
- Under the Payments section, select Set Up Payment Elections.
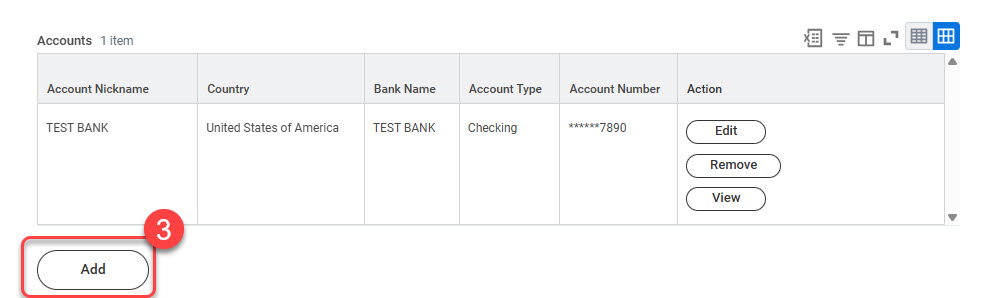
- Under the Accounts grid, select the Add button.
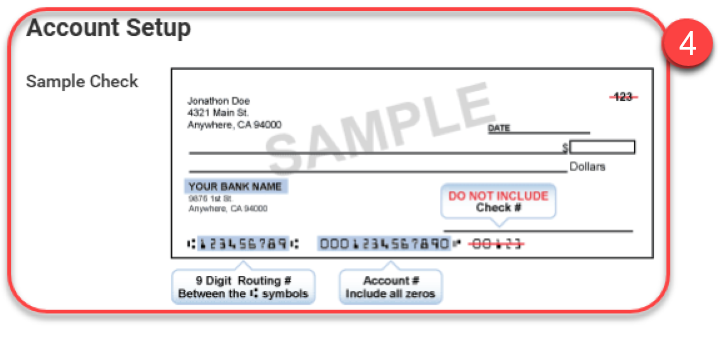
- Review the Account Setup information.
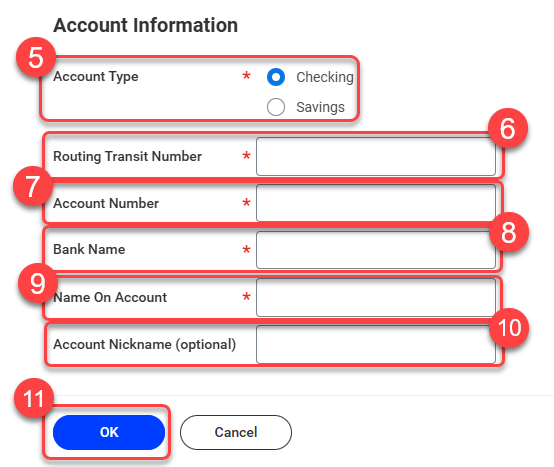
- Select Account Type.
- Enter the Routing Transit Number.
- Enter the Account Number.
- Enter the Bank Name.
- Enter the Name on Account.
- Enter the Account Nickname (Optional).
- Select OK.
REMINDER: Do NOT use a payment card number in lieu of a bank account number. If you wish to make a payment via payment card, see How to Pay by payment card.
IMPORTANT: If you are updating your bank account to change the accounts of your Payment Elections, please continue to the Edit Payment Elections section.
Edit Student Payment Elections
There may come a time when you need to update your student payment elections either due to adding a new bank account or you may want to switch from Direct Debit to Check. The following steps outline that process.
- Navigate to the sidebar on the left, hover over UR Student, then select the Finances app under UR Student. If UR Student is not visible, select the More icon.
- Under the Payments section, select Set Up Payment Elections.
- In the Payment Elections grid, use the Edit button to edit the “Pay Type” you wish to change.
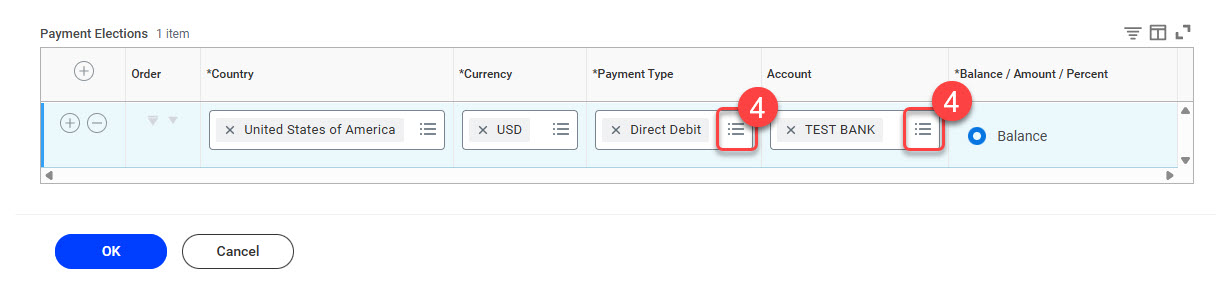
- Select the More icon to change the Account or the Payment Type.
- If you edited the “Student Payment” payment election rule AND changed your bank account, you will receive an ACH Authorization form in your My Tasks area that requires your approval. See the Payment Authorization section above for step-by-step instructions on how to submit the form. Refresh your screen if you do not see the “My Task” item immediately.
IMPORTANT: You MUST submit the ACH Authorization form each time you edit the Student Payment payment election and change the bank account to a new value. There is no Authorization form for the Expense Payment or the Student Refunds payment election rules.