Page Contents
- Overview
- Add a Third Party Delegate (Friends & Family)
- Manage Permissions for Third Party After-the-Fact
Overview
You may want someone other than yourself to be able to access your UR Student-Student Financial account. Perhaps a parent, guardian, partner or someone else will be making payments and tracking your financials while you are attending University of Rochester. Adding someone as a contact is the first step to adding a third party delegate. Follow these steps to add a contact as a third party delegate to your student account and to manage their permissions.
Add a Third Party Delegate (Friends & Family)
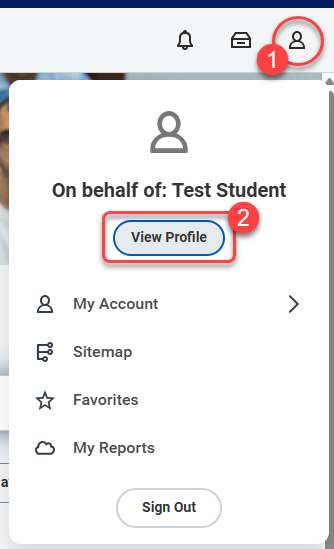
- Select your profile icon or picture (upper right corner).
- Select View Profile.
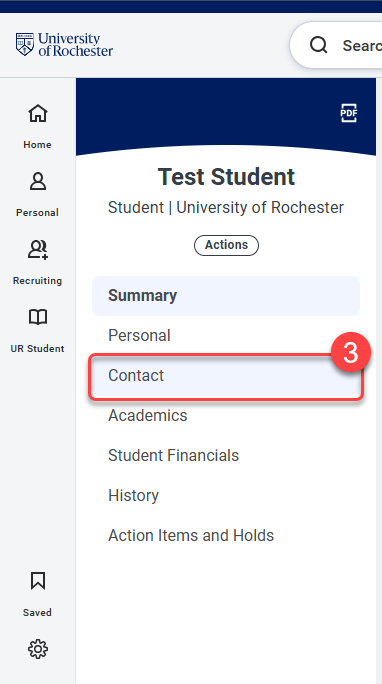
- Select Contact (left column under your name).
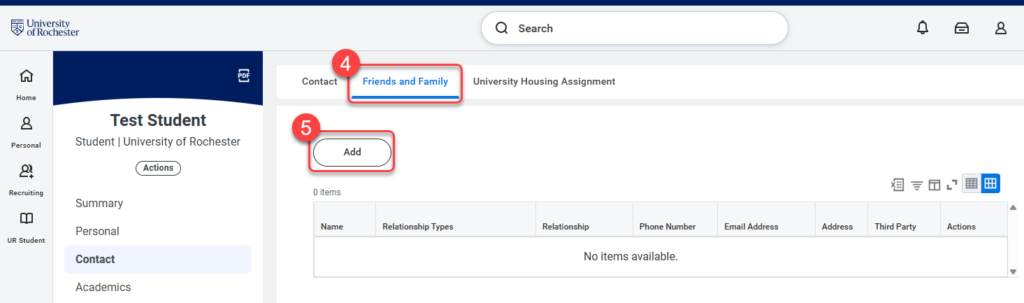
- Select the Friends and Family tab.
IMPORTANT: If you do not see your Friends and Family tab, check to ensure you are on your Student Profile by reviewing How to Switch to your Student Profile. - Select Add.
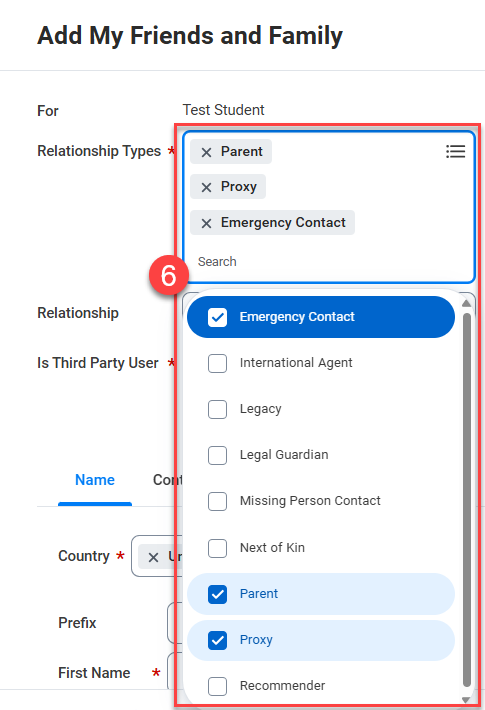
- On the Add My Friends and Family screen, click into the Relationship Types field, then select the appropriate description(s).
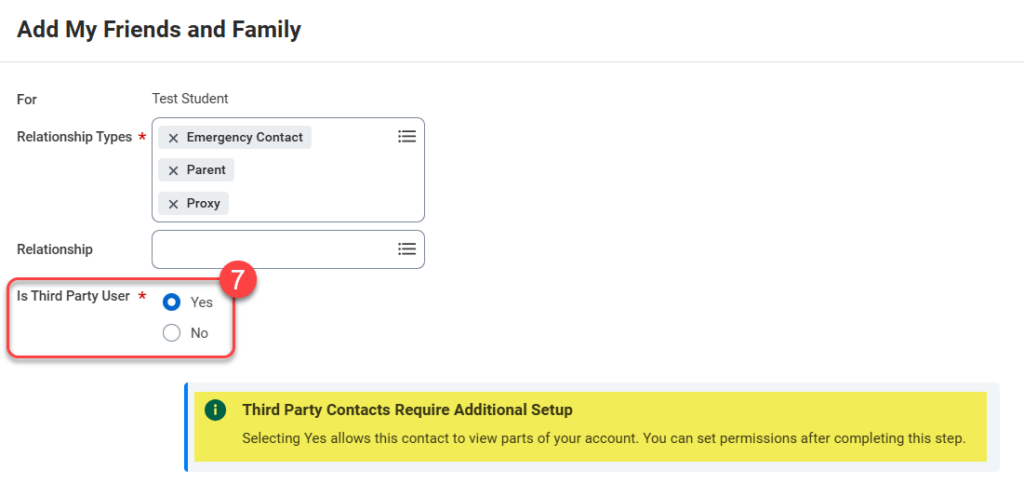
TIP: One person can have multiple relationship types. - Select the Yes radial button for the Is Third Party User field.
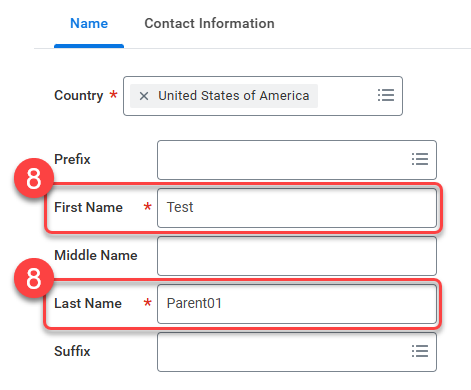
IMPORTANT: An alert will display with further instructions to ensure your third party user can access tasks you wish for them to conduct on your behalf. The alert reads: “Third Party Contacts Require Additional Setup. Selecting Yes allows this contact to view parts of your account. You can set permissions after completing this step.” You may change this setting at any time. - Enter the required fields of First Name and Last Name.
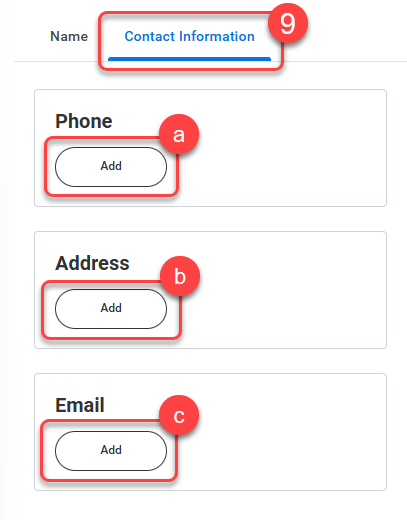
- Select the Contact Information tab, then click Add next to and complete the information in each of the following sections:
- Phone
- Address
- Email*
*IMPORTANT: You must enter an email for a third party delegate and it should be unique to each third party. You cannot use the same email address for third parties sharing the same email. Verify the email address is entered correctly. This is the method to which confirmation is sent allowing your Third Party to complete their access.
TIPS:
1. Recommend to your Third Party to check their spam email folder for the confirmation email.
2. The Third Party Delegate will be required to set up multifactor authentication within the first three logins or access will be denied. Please refer to the Bursar’s Third Party website for more information.
- Select OK
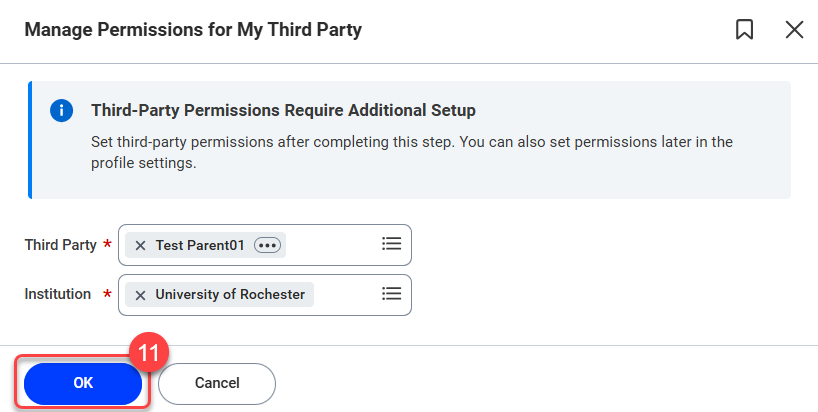
- If you selected Yes for Is Third Party User?, you will be redirected to the Manage Permissions for My Third Party task automatically. Confirm the information presented, then select OK.
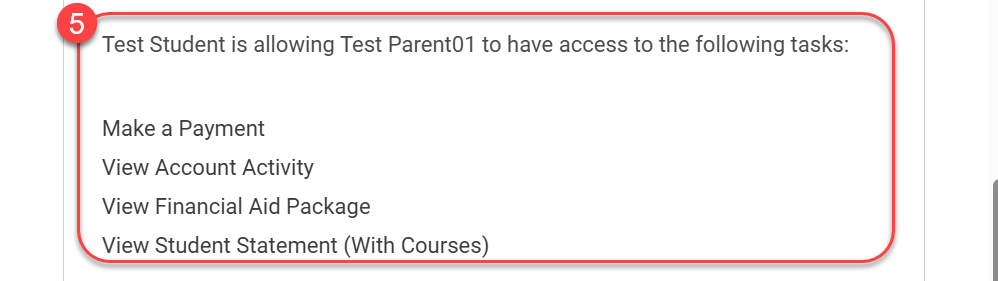
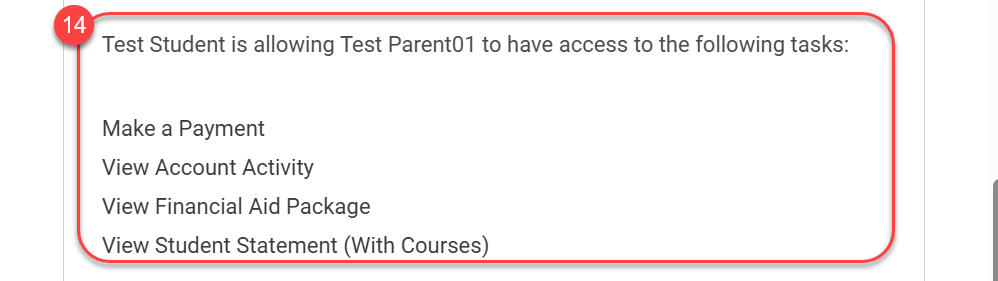
- There are four tasks available for Third Parties which are listed by name with descriptions. You can choose to allow for any combination of tasks for your Third Party Proxy by checking the box next to each task for which you wish provide to them permissions.
- Make a Payment: Make a Payment on the student’s behalf.
- View Financial Aid Package: View financial aid offers and estimated annual costs on the student’s behalf.>
- View Account Activity: View student account transactions (charges, payments, and refunds), current amounts due, and available payment plans.
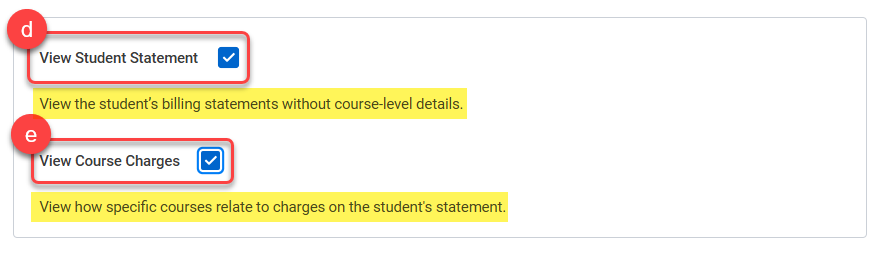
- View Student Statement: View the student’s billing statements without course-level details.
- View Course Charges: View how specific courses relate to charges on the student’s statement. (This option is only available if the “View Student Statement” permission is selected.)
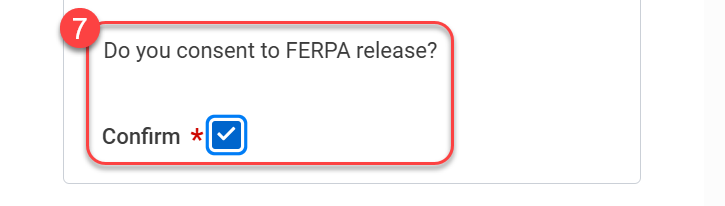
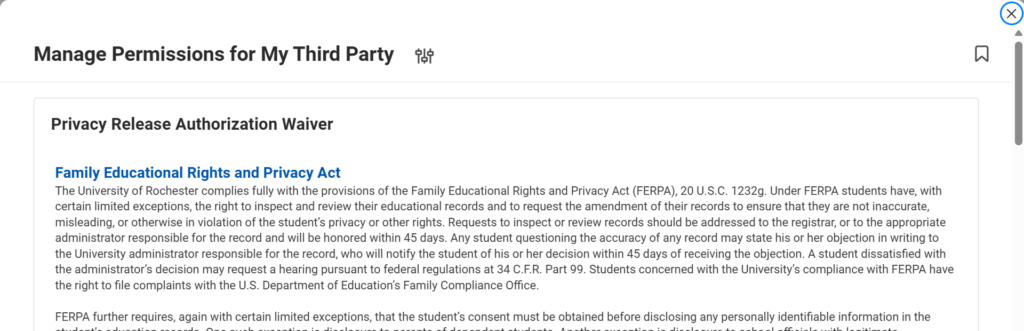
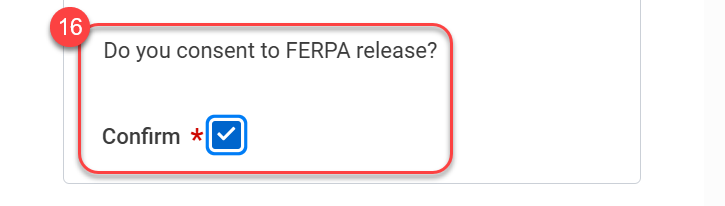
- Review the Family Educational Rights and Privacy Act Privacy Release Authorization Waiver.
- Confirm the tasks listed are those you want your named Third Party proxy to have access to.
- Enter a Purpose of Waiver statement. For example, “I want to give permission for my parent to make payments on my behalf.”
- Select the Confirm checkbox.
- Select Submit.
- Your Third Party now has access to the task(s) for which you granted them permission(s).




Manage Permissions for My Third Party After-the-Fact
If you did not make your contact a Third Party User when you first entered them into the Friends and Family area of your contacts, please use the Edit Friends and Family drop-down action to select Yes for Is Third Party User as done in Step 7 above, then complete the following steps. If wish to remove some or all of the permissions you initially provided to your Third Party user, you can manage them at any time. The following steps outline how to manage your Third Party’s permissions. You may update these permissions at any time.
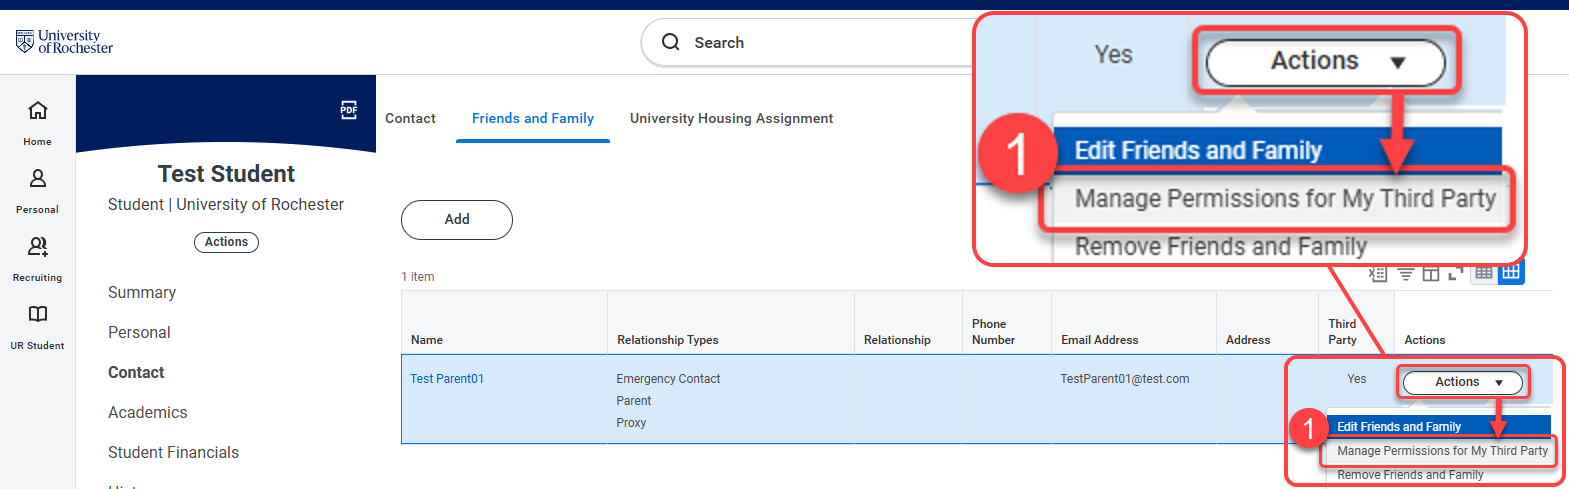
- From the Third Party contact on your Friends and Family tab that you wish to grant/remove permissions, select the Actions drop-down, then select Manage Permissions for My Third Party.
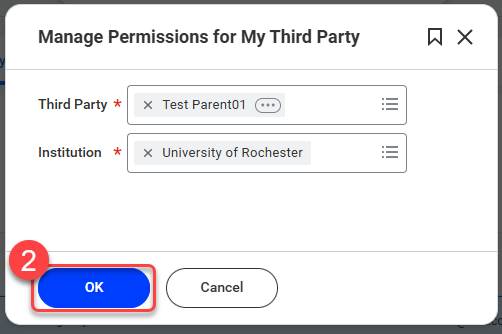
- Confirm you are managing permissions for the appropriate Third Party contact, then select OK.
- There are four tasks available for Third Parties which are listed by name with descriptions. You can choose to allow for any combination of tasks for your Third Party Proxy by checking the box next to each task for which you wish provide to them permissions. If you want to change the permissions already granted to your Third Party, simply uncheck boxes for tasks you wish to remove or check boxes for tasks you wish to add.
- Make a Payment: Make a Payment on the student’s behalf.
- View Financial Aid Package: View financial aid offers and estimated annual costs on the student’s behalf.
- View Account Activity: View student account transactions (charges, payments, and refunds), current amounts due, and available payment plans.
- View Student Statement: View the student’s billing statements without course-level details.
- View Course Charges: View how specific courses relate to charges on the student’s statement. (This option is only available if the “View Student Statement” permission is selected.)
- Review the Family Educational Rights and Privacy Act Privacy Release Authorization Waiver.
- Confirm the tasks listed are those you want your named Third Party proxy to have access to.
- Enter a Purpose of Waiver statement. For example, “I want to give permission for my parent to make payments on my behalf.”
- Select the Confirm checkbox.
- Select Submit.
- Upon submission, you will be redirected to the Friends and Family tab.
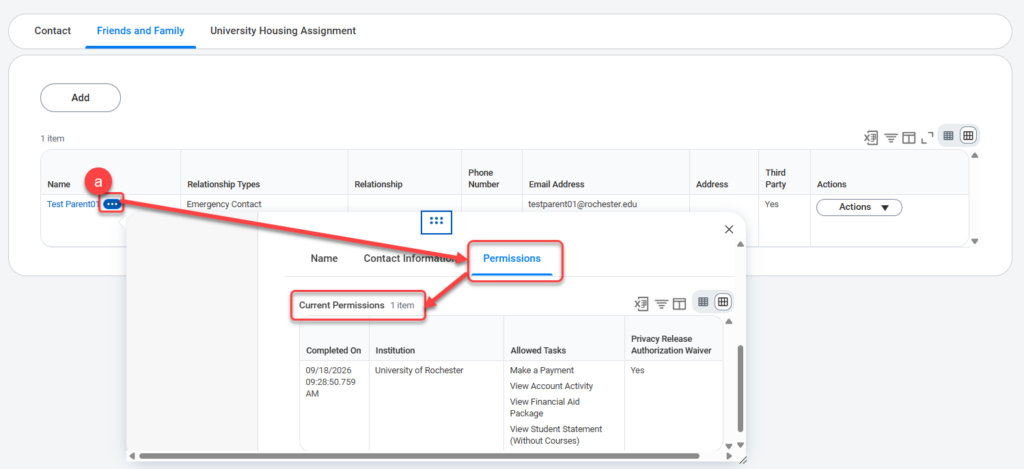
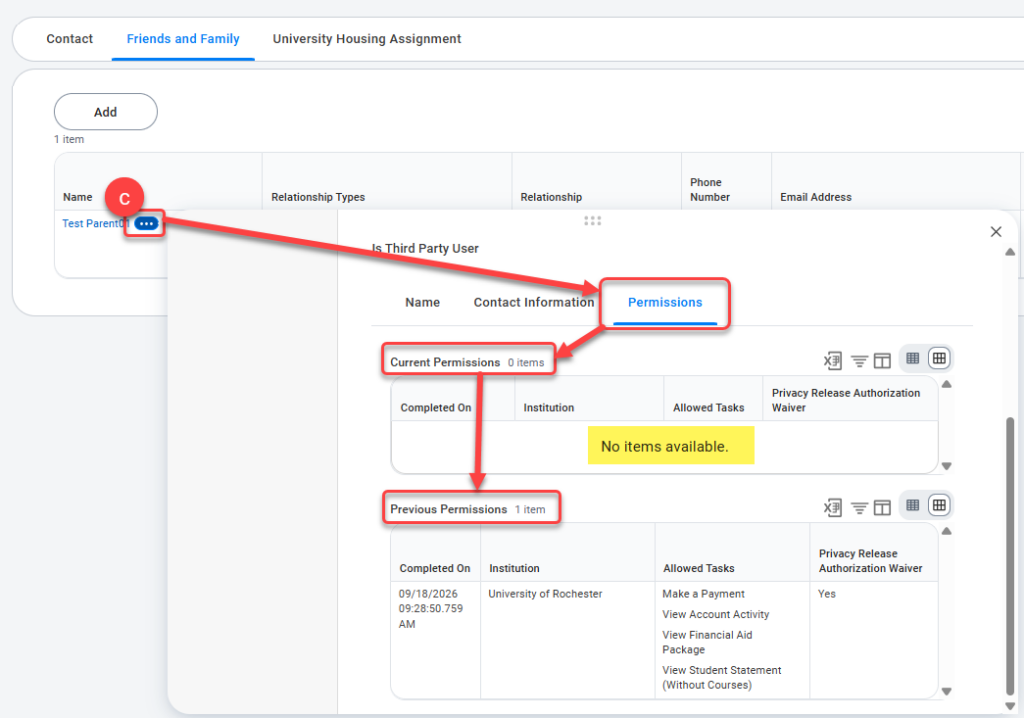
- If you altered your Third Party’s permissions, you can confirm allowed tasks by clicking on the related actions button next to your Third Party’s name, selecting the Permissions tab, then reviewing the information displayed in the Current Permissions table.
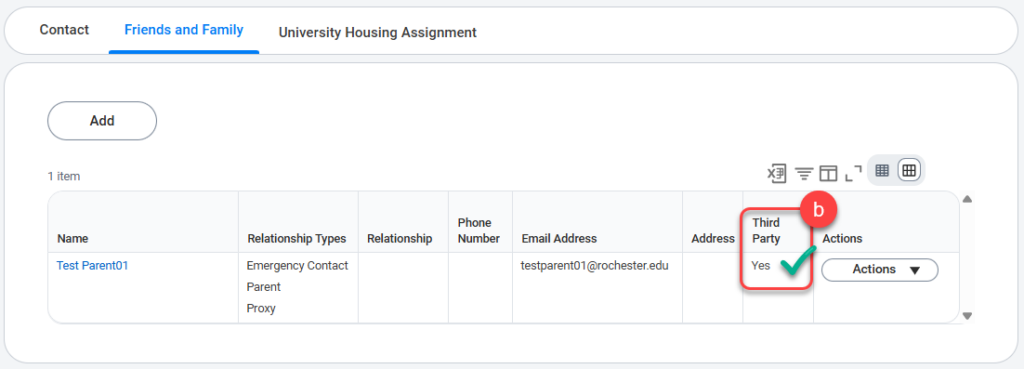
- If you selected Yes for Is Third Party, confirm that “Yes” appears under the Third Party column, then direct your Third Party to review their Inbox and/or Spam Folders for two emails pertaining to their new account.
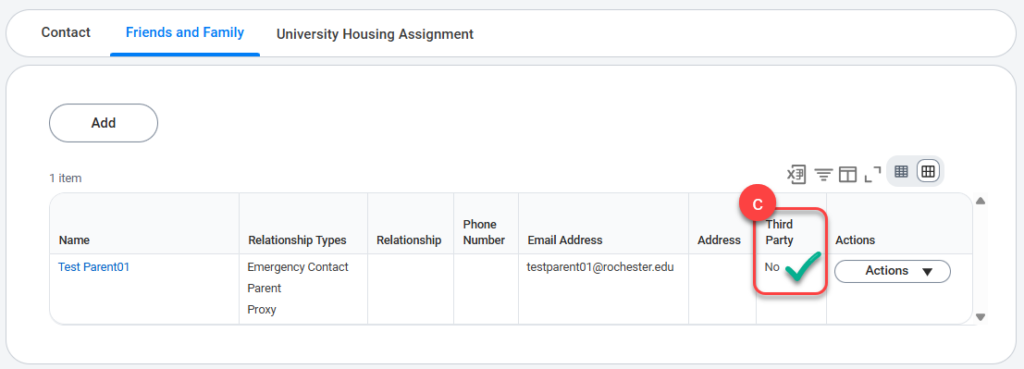
- If you selected No for Is Third Party to remove the contact as a Third Party entirely, confirm “No” appears under the Third Party column, then confirm that the Current Permissions table states “No items available.” and the Previous Permissions table is populated with the permissions you just removed from your Third Party.
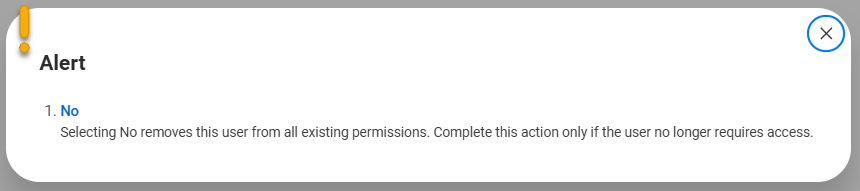
IMPORTANT: Selecting No for Is Third Party User will remove all existing permissions for your Third Party, thus removing all access. Complete this step only if your Third Party no longer requires access.