Page Contents
Overview
Throughout your time as a student at University of Rochester, you will want to view your tuition or other charges, view any financial aid you receive, make payments and confirm the payments have been received. Follow these steps to successfully attend to your financial wellbeing.
IMPORTANT: For the most up-to-date financial aid information, you should consult FAOnline.
View Your Bill and Financial Aid
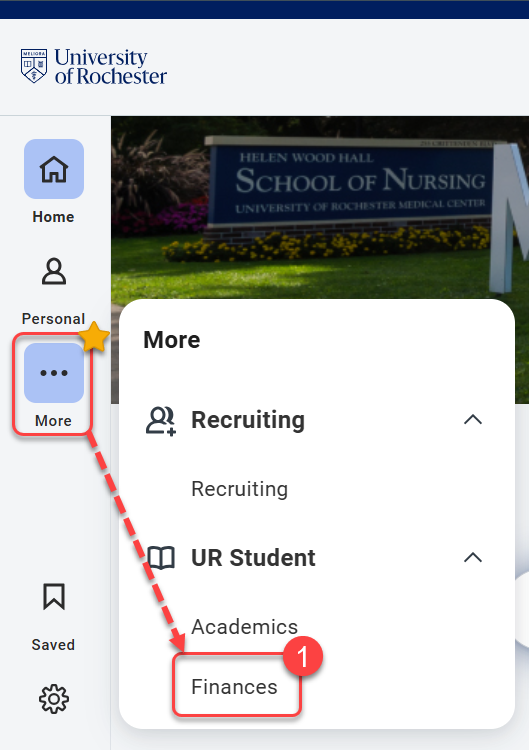
- Navigate to the Global Menu area, then click Finances under UR Student.
TIP: If you do not see UR Student in the Global Menu, click the “More” icon.
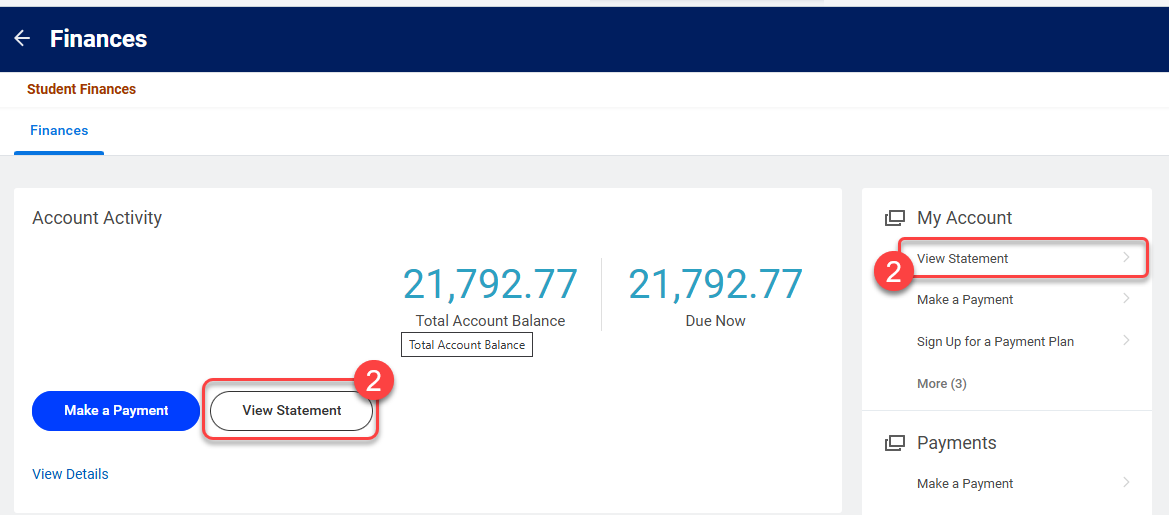
- Click View Statement under “Account Activity” or “My Account.”
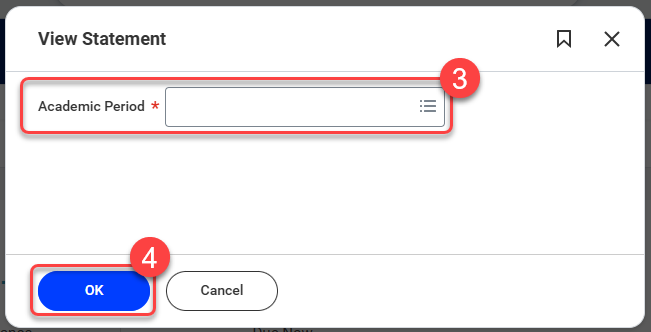
- Specify the relevant Academic Period.
- Select OK.
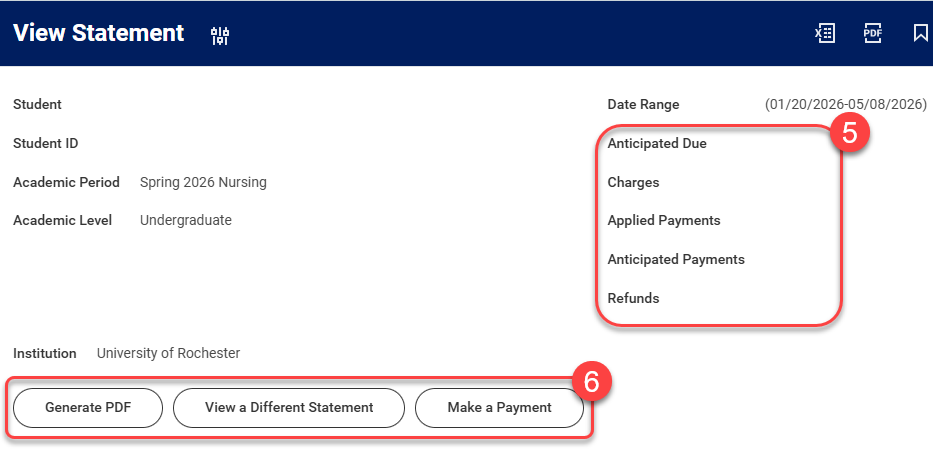
- View Statement shows a summary of Charges, Applied Payments, Anticipated Payments, Refunds, and Courses for that Academic Period at the top of the screen. Scroll down the page to see the details for each. Each section can be filtered or exported to Excel. Below is a glossary of the terms you may see on your statement.
- Anticipated Due – Amount due after Applied and Anticipated payments.
- Charges – show date of charges, description and the amount.
- Applied Payments – display the date, Payment Type, Payment Amount and Applied Amount.
- Anticipated Payments – include Financial Aid date, type of Financial Aid and the amount.
- Refunds – show any amount that have been refunded.
- Courses – the courses and the number of units.
- From View Statement, you can Generate a PDF, View a Different Statement, or Make a Payment.
Pay Your Bill
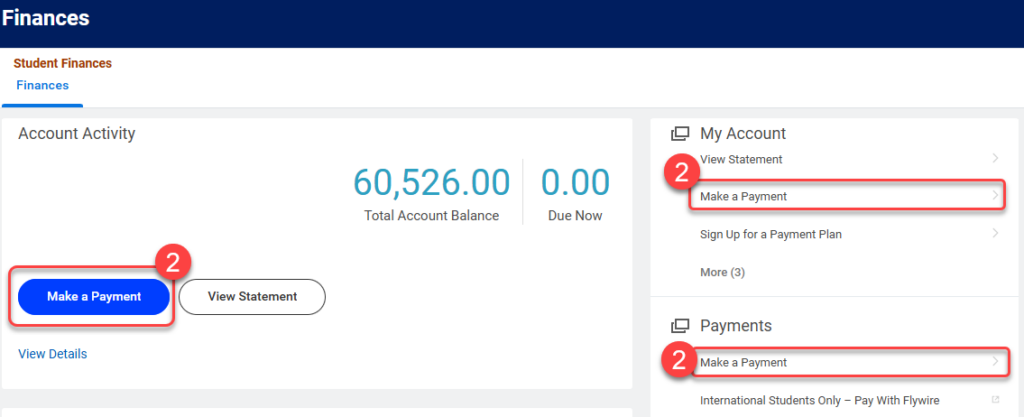
You can pay your bill from “View Statement” or from the Finances area in the global navigation menu.
- Navigate to the Global Menu area, then click Finances under UR Student.
TIP: If you do not see UR Student in the Global Menu, click the “More” icon.
- Select Make a Payment under “Account Activity,” “My Account,” or the “Payments.”
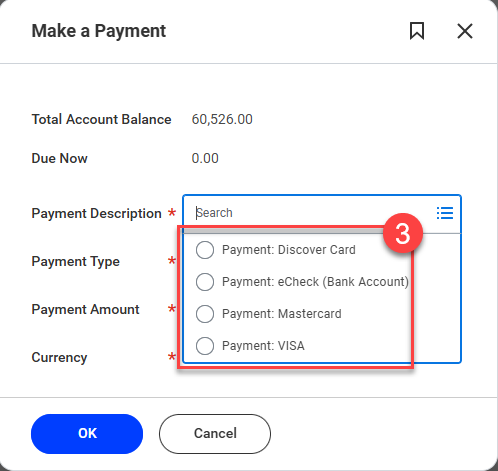
- Select the Payment Method you wish to use in the Payment Description field.
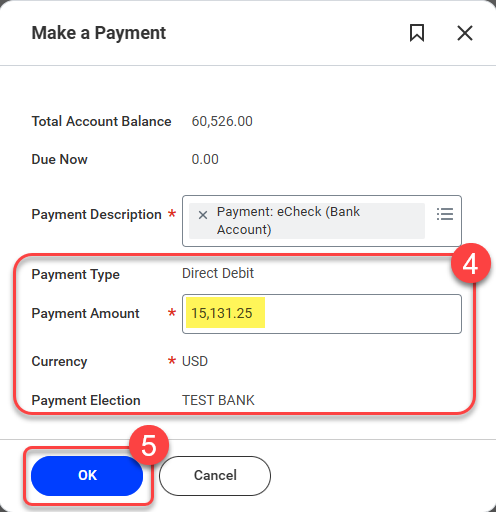
- The Payment Type, Payment Amount, and Currency will auto-fill based on Payment Type selected. You can change the Payment Amount as needed.
- Click OK.
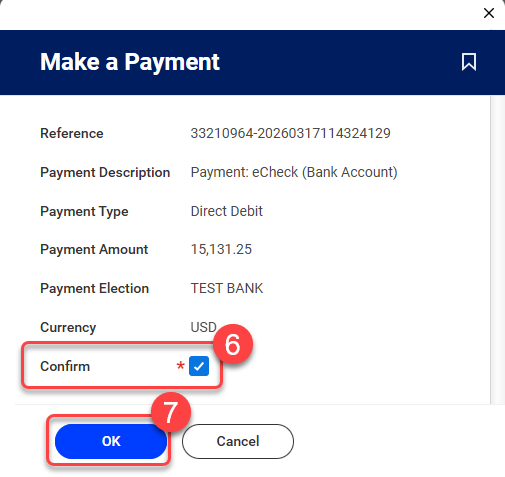
- Review the Make a Payment page, then select the Confirm checkbox.
- Select OK to submit the payment.
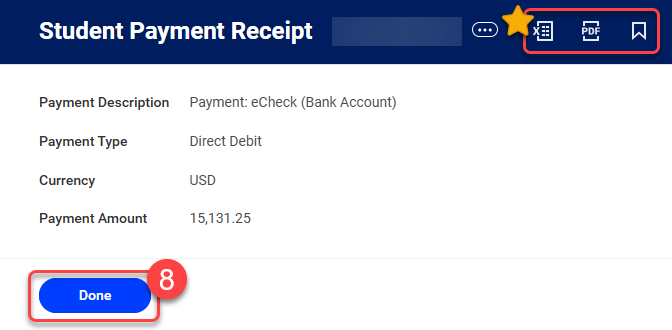
- Review your Student Payment Receipt and select Done when finished to return to your Finances app.
TIP: You can export the receipt to Excel or PDF in the top right corner of the Student Payment Receipt page.