If you have developed course materials in Blackboard in a previous semester, you may want to move them into a current course by copying or exporting, then importing. This process refers to copying content from and Original course into another Original course
FYI before you begin:
If your source course is from a previous semester, you will need to find the course in its TERM on the courses page.
Both of these methods will ADD, not replace content in the destination course, so some cleanup may be required after the copy completes in order to get rid of duplicated or unwanted Course Menu items.
If you have tests and question pools in your source course, it may be best to use the export/import method. Otherwise follow the instructions below for Copying Your Course.
Exporting & Importing Your Course
Exporting Your Course
1. Click on desired Content Area from the Course Menu.
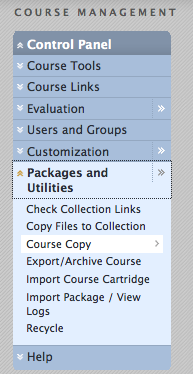
2. Under Control Panel, use the pulldown next to “Packages and Utilities” to choose Export/Archive course.
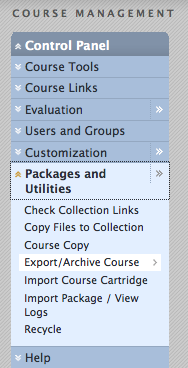
On the next screen, you will probably find that there are no existing export files. You will now create an export file by clicking the “Export” button.
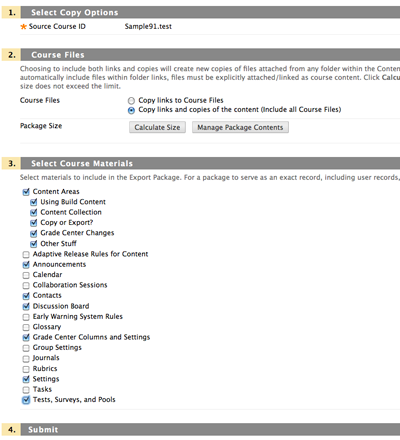
3. You will now be presented with a list of all possible Bb content and tools that might be in your course. Choose any elements that you want to copy into the destination course.
If you are copying assignments or tests, be sure to also check “Grade Center Columns and Settings”, Otherwise assignments and tests will not copy over.
** PLEASE NOTE: Note that if you copy Settings, and the source course is Available, the new course will be set to Available. If you choose Settings and you want the new course to remain unavailable, be sure to switch it back off after the copy is complete
Always be sure to select “Copy Links and copies of the content.” This should be selected by default.
4. When you’ve selected everything you want to copy, click Submit.
Blackboard will confirm your request and send you an email when the export file is complete.
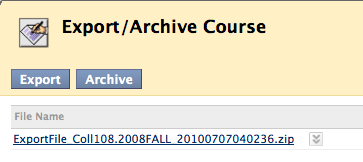
5. Once you’ve received the email saying your export is complete, return to the source course, go to Packages and Utilities and choose Export/Archive course as you did in Step 2. You should now see your export file listed. Click on the hyperlinked file name to download the file.
Import Your Course
1.. To import this file, enter the course where you want to import the materials, the “destination” course.
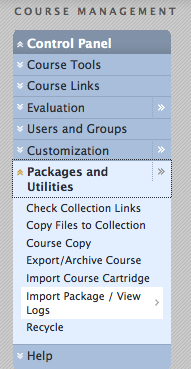
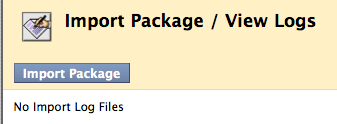
- In this course, under the Control Panel, use the pulldown next to Packages and Utilities to choose Import Package (NOT import Course Cartridge)
2. On the next screen, click the Import Package button
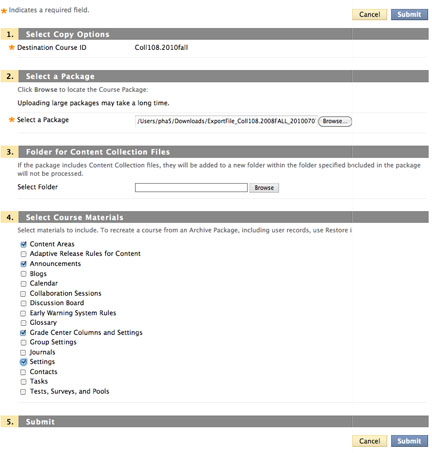
3. Navigate to the location on your local computer where you downloaded the export file from the source course and choose it.
4. Choose all the items you want to import. It is best to just choose everything as the system will only import what is in the export file.
5. Click Submit.
In a few minutes, you will get an email notifying you that the process is complete. Please note: this may or may not be the case. It frequently happens that the email arrives before the copy is done. If you go to the destination course and do not see the content, please wait another half hour or so before concluding that your copy or import has failed.
Remember that this process ADDS to the existing course. If left hand menu items have the same name, the content will be added at the bottom of the menu area.
Copying Your Course
1. Enter the original or “source” course. (Please note that you cannot copy INTO an Ultra course – this is only for copy into another Original course)
2. Under Control Panel, use the pulldown next to “Packages and Utilities” to choose Course Copy.
3. On the next screen, select “Copy Course Materials into an Existing Course.” (NB: Instructors do not have system permissions to create new courses.)
4. To select the “destination” course, click the “Browse” button. It will list all courses in which you are the instructor.
5. From the list in Item 2 on this screen, choose any elements that you want to copy into the destination course.
We recommend that you Select ALL and then Uncheck the following: Any Content areas that you do not want to copy, Announcements, Settings.
Note: If you are copying assignments or tests, be sure to also check “Grade Center Columns and Settings..” Otherwise assignments and tests will not copy over.
Please make sure that Settings is UNCHECKED.
6. Be sure “Copy links and copies of Content” is selected.
7. Do not include enrollments.
8. Submit


In a few minutes, you will get an email notifying you that the process is complete. Please note: this may or may not be the case. It frequently happens that the email arrives before the copy is done. If you go to the destination course and do not see the content, please wait another half hour or so before concluding that your copy or import has failed.
Remember that this process ADDS to the existing course. If left hand menu items have the same name, the content will be added at the bottom of the content area. All other items are added to the bottom of the menu.
Copying Courses with Panopto Content
If you use Panopto streaming media in your course and want previous videos available in the current course, you need to make copies of those videos into this semester’s course folder.
It is possible that this will happen automatically, if you perform the following steps in order.
- Perform your course copy as mentioned above. Be sure that Settings are UNCHECKED
- Immediately after the copy is complete, provision the Panopto folder by clicking on the Panopto Course Folder tool in your course (this can be accessed in the Access to Tools or similar link on the left hand menu)
If the videos do not copy automatically, you will need to do that within Panopto. Note that copies will not be immediate, it may take up to 24 hours for the videos to copy (although it is typically within 1-2 hours). See How to Batch Copy and Move Videos
If you’re not sure of the best option, or you have any questions about Panopto content in your copied course, contact your Blackboard Support Team.
If you use any of the following tools in your course, you will need to relink them in the new course.
- Voicethread
- Zoom
- Yellowdig
- Perusall
Voicethread links will need to be clicked to reassociate them with the actions in Voicethread and with your new course.
If you are using the Assignment Builder function, Voicethread will automatically make a new copy of your Voicethread for use with just your own comments. But be sure to review to make sure that any comments you made to/about students are removed.
If you are not using Assignment Builder, you may want to make copies of your existing Voicethreads prior to this in order to link the new versions in your new course. Be sure to only include your own comments so to protect the privacy of your previous students.
For Perusall, you will click the link to make a new Perusall course area. You can then copy materials and assignments from past courses into this space. For more information, see Perusall documentation.
For Zoom and Yellowdig, it is easiest to delete the links and recreate them. You can copy settings from a previous Yellowdig community when the new community is created.