Manage Users and Groups
Review the information about Course Roles before adding a user into your course.
A user’s permissions within a course are controlled by the course role assigned to that user. Listed below is a brief explanation of the roles.
- Instructor: Full course permissions, with the ability to add other instructors as well as all other course roles
- Teaching Assistant: All the same permissions as Instructor.
- Course Builder: Permissions to edit all course content and tools, but does not have access to grading assignments or assessments, and does not have access to the Gradebook.
- Grader: Can grade assignments and assessments and has access to the Gradebook, but does not have access to edit course content. No ability to add or modify users.
- Student: Can access content and tools that have been made available by the Instructors, TAs and Builders. Is listed in the Gradebook and included in Grade statistics.
Instructors, TA’s and Course Builders can always access the course, whether or not it has been made available.
Graders and students cannot access a course unless it has been made available.
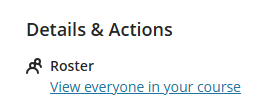
In Ultra courses, persons that have access to your course are listed in the Roster. Whether you want to list some or all users in your course or enroll a new user, you will start by going to the Details & Actions section on the right-hand side of the screen. There click on the “View everyone in your course” hyperlink under Roster.
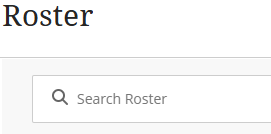
To search for a user, click on the magnifying glass and start typing in the search box that appears.
The most common reason the add a user is to add a TA, or to enroll a student whose registration is delayed.
Note: The most common problem with trying to add a user is adding someone who has at any time been enrolled in, and then dropped the course. The message displayed will show as “No results found. Check the spelling and try again”. It is not possible for instructors to add such a user. Please contact your Blackboard Support Team with the user name and Blackboard ID or Student ID (if possible) and the course you want the user added to.
Note: Additional Instructors and Teaching Assistants can be assigned in UR Student. When these roles are published, they will automatically be sent to Blackboard for enrollment into the associated course. Additionally, they will be sent to HelioCampus for course evaluation purposes. Persons (students nor teaching assistants/instructors) added to a course manually will not be part of the course evaluation process.
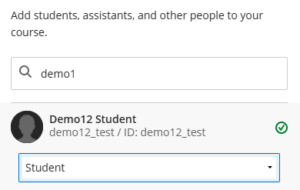
To add a user, click on the plus sign in the upper right corner of the Roster screen. Then start typing the user’s name in the search box.
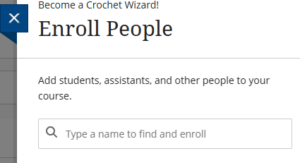
Once the user you are looking for appears, click on the plus sign next to their name to add them to the course
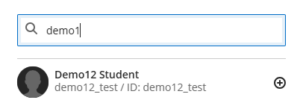
Confirm their role, and then click save.
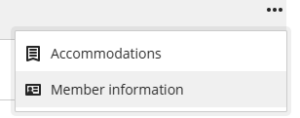
Find the person that you want to remove from the course. Click on the three dots near their name. ![]()
Choose Member Information
On the card with their name, choose the Trash can icon.
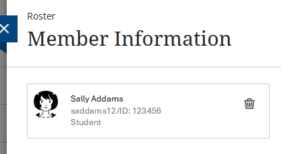
Note: Please do not remove student users. Until the student is officially dropped by the Registrar’s office, the enrollment will be automatically re-enabled each time the registration data is updated in Blackboard. Also, when they drop the course they will be removed automatically and their student data will be preserved.
Member information provides you the following:
- Username and Student ID
- Name Pronunciation (if provided)
- Pronouns (if provided)
- Role in course
- Email address (available only to instructor)
Find the user that you want know more about. Click on the three dots near their name. ![]()
Choose Member Information

Accommodations for students are set at the course level, not the assignment level.
Find the student that you need to add an accommodation for. Click on the three dots near their name. ![]()
Choose Accommodations

If you are still using Original courses, documentation is below
Whether you want to list some or all users in your course or enroll a new user, you will start by going to the Users and Groups link under the Control Panel. Use the pulldown to choose Users. If you want to separate your students into groups within your course, choose Groups.

Users
From the Users screen, you can either search for specific users in your course, list all the users in your course, or enroll a new user.
List or search current users in your course
To search for enrolled users, set the search tool on the Users screen to search by user name or last name, etc., enter the value you want to search on, and click Go.If you want to list all the enrolled users in your course, set the search to Username and Not Blank.

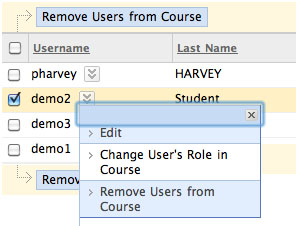
Next to each user’s name is a pulldown menu, from which you can choose to change the user’s role, or remove the user.
Please note that this is not the way to remove a student who drops the course. Until the student is officially dropped by the Registrar’s office, the enrollment will be automatically re-enabled each time the registration data is updated in Blackboard.
Follow the steps below, and/or see a video tutorial on adding users.The most common uses of the Enroll User function are to add a TA, or to enroll a student whose registration is delayed.
Note: The most common problem with trying to add a user is trying to add someone who has at any time been enrolled in, and then dropped the course. The error it will return is “User is already enrolled.” It is not possible for instructors to add such a user. Please contact your Blackboard Support Team with the user name and Blackboard ID or Student ID (if possible) and the course you want the user added to.
Note: Additional Instructors and Teaching Assistants can be assigned in UR Student. When these roles are published, they will automatically be sent to Blackboard for enrollment into the associated course. Additionally, they will be sent to AEFIS for course evaluation purposes.
1. To enroll a new user, open the Users and Groups area under the Control Panel and choose Users.
- Do NOT use the Search tool that appears on the Users screen. That tool is for listing users already enrolled.
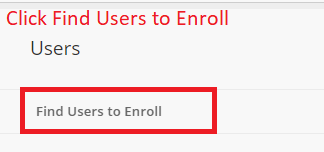
- Instead, click “Find Users to Enroll.”
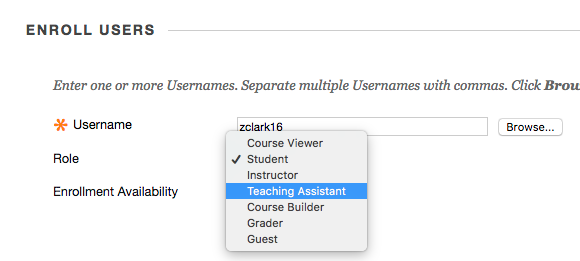
2. Enter the user name of the user you want to enroll. This value has to be the Blackboard user name (NetID). If you don’t know the user name, you can use the Browse button to search the Blackboard user database using the last name, first name, or email address of the user.
** PLEASE NOTE: If you already know the username (NetID) and enter it in the box, do NOT then hit browse. You only need to use the browse button if you do not know the user’s Blackboard ID and need to search for it.
3. Once you have the username appearing in the text box, you can add other user names, separated by commas.
4.Choose the role of the new user from the pulldown list. The default is student. (See course role definitions below.)
5. Click submit.
- If you are not able to find the student you’re trying to enroll:
- Be sure you have not done your search on the Users screen. That searches your current enrollment. First click Find Users to Enroll.
- Once you click Find Users to Enroll, if you use the Browse button to locate the student, be sure you have set the proper search criteria: If you’re searching by last name, set the first pull down to Last Name (as opposed to leaving it at Username).

- If an error is returned: “User is already enrolled,” but you can’t find the user in your course, contact your Blackboard Support team.
- If you’ve checked all these steps and the user still can’t be found, contact your Blackboard Support team.
Groups
Creating a Single Group (Original)