Panopto can be used to create videos from your desktop, or can be used to stream videos created in external software packages.
How to Access Recordings / Getting Started
From within Blackboard
1. Inside your Blackboard course, you will see links to Panopto videos.
2. Click on the link to the video. This will take you to the Panopto web site. You will need to login here.
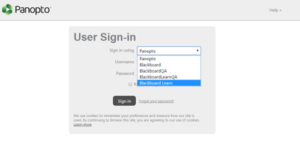
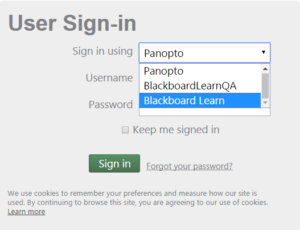
3. Change the Sign in Using dropdown to read Blackboard Learn. And then click the Sign In button. You may be automatically logged in. If not, you will see a Blackboard login screen. Use your Blackboard username and password to sign in. The video you chose will then be accessible.
From the Web
Panopto can be accessed from the web at http://rochester.hosted.panopto.com
1. Log in with your Blackboard credentials. Make sure to change the “Sign in Using” option to Blackboard Learn and then click the Sign In button. If you are already logged into Blackboard in the same browser you may not need to log in again. Otherwise, when the Blackboard login screen appears, use your Blackboard username and password. You will have access to the sessions (recordings) and folders that are available to your user account.
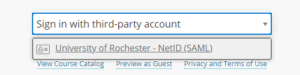
On this next screen, click on Sign in with third-party account.
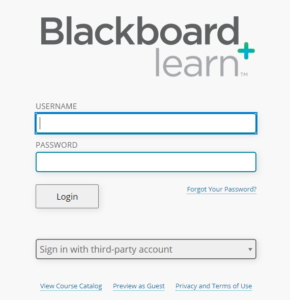
Choose University of Rochester – NetID (SAML) and enter your NetID and password.
Note that IE 8 and IE 9 are no longer supported due to SSL requirements.
If you are using IE 11, you will need to set Compatibility mode in order to have Panopto work. See instructions.
Getting Started with Recording
Sometimes you may want to create a video that supplements your lecture. Or you are teaching an online course and want to record individual lessons.
We recommend the use of Panopto for recording and playback of these types of video. Panopto includes desktop recording software for both Macintosh and Windows, as well as streaming playback capabilities. Additionally, there is an iOS mobile application for uploading videos created on your iPhone or iPad.
Videos created with Panopto can include live video as well as Powerpoint slideshows and/or desktop screen capture, providing you with a powerful tool for creating a video lecture.
Example Desktop Recording Clip with Panopto (Captures Powerpoint slides and later Desktop application)
Videos created with Panopto can be linked directly in your Blackboard course and access is restricted to students within your course.
Step 1: Commission your Blackboard Course to use Panopto
This needs to be done in each course that you plan to create or use recordings or stream video.
Step 2: Download and Install Panopto
This must be done once for each computer that you plan to create recordings.
**PLEASE NOTE: you must be a “creator” to see the download option. Any instructor who commissions their course, as per step 1 will be designated as a “creator”.
- Download the software
- Using an iOS Device
Step 3: Use Panopto to Record your Lectures
- Online Tutorials
- Documentation
Step 4: Edit your Recordings
Step 5: Add your Recorded Lectures to your Blackboard course
After your recordings are processed you will receive an email. At that point you can link them into your Blackboard course.
Upload a Video to Panopto for Streaming
In addition to using Panopto to create desktop recordings, you can upload videos created externally and link to them within your Blackboard course. This provides both the security of access only to the students in your course and the benefits of streaming video.
Examples include review sessions, student presentations, and regular classes. When these videos are long (large in size), uploading them directly to Blackboard can cause problems, both for you and for your students. Large videos require long wait times to download for viewing and can cause issues with Blackboard performance.
How to get started:
Step 1. Commission your Blackboard course
Step 2. Log into the Panopto web site.
**See “How to Access Recordings / Getting Started” in the button above.
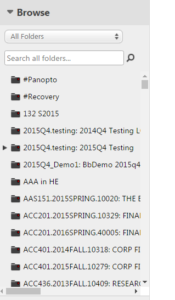
Step 3. Find your course folder.
On the left hand side, find and click the area that says “Browse”
Find the course folder into which you wish to upload videos and click it.
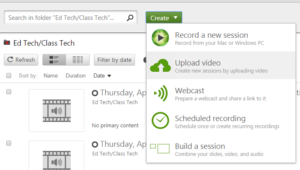
Step 4. Upload your video.
At the top of the screen, choose “Create” and then “Upload video”
Please make sure that the video you are uploading complies with the resolution requirements for Panopto. Videos may not exceed a resolution of 1920×1080.
If your video is higher resolution than this, you may need to adjust the settings in the software used to create the video, or convert the video to a lower resolution.
How to lower the resolution of a video file: http://www.tweakandtrick.com/2014/01/convert-videos-vlc.html
If your video file exceeds the maximum resolution, you will see the following error after upload: Could not encode FILENAME. Task failed. Contact support for additional information.
Browse for a file, or drag the file into the dashed box.
Wait for the file to upload. Once the file is uploaded, you can close the status window.
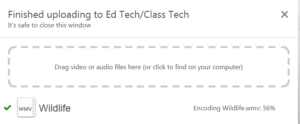
The video must now be processed for streaming format. You will receive an email once this is complete.
Step 5. Link the videos in your Blackboard course.
Once your video has been processed, you can make it available to the students in your course.