With the increased use of Zoom web conferencing for meetings, it’s important for the University of Rochester and URMC’s meeting hosts to ensure their Zoom settings are configured to prevent unwanted attendees or content from disrupting the meeting. The following information offers guidance and recommendations for meeting hosts.
Keep your client up to date
Zoom’s updates contain bug fixes, security patches, and new features. To take advantage of these features, be sure to keep your Zoom client up to date.
If you’re using a university-managed computer, Log into the Zoom client, click on your profile picture in the upper right corner, and then click Check for Updates. You will be notified of any updates and prompted to install them.
If using a personal computer, please go to https://zoom.us/download to ensure the latest version of Zoom and the Outlook plug-in are installed.
Before the Meeting
A few settings can help control who can access your event before or when scheduling a meeting. Each can be managed through Zoom’s Advanced Options in the online account or the Schedule menu in the desktop Zoom application.
A passcode or waiting room is required if the meeting link is shared on a public website, through social media, or via email.
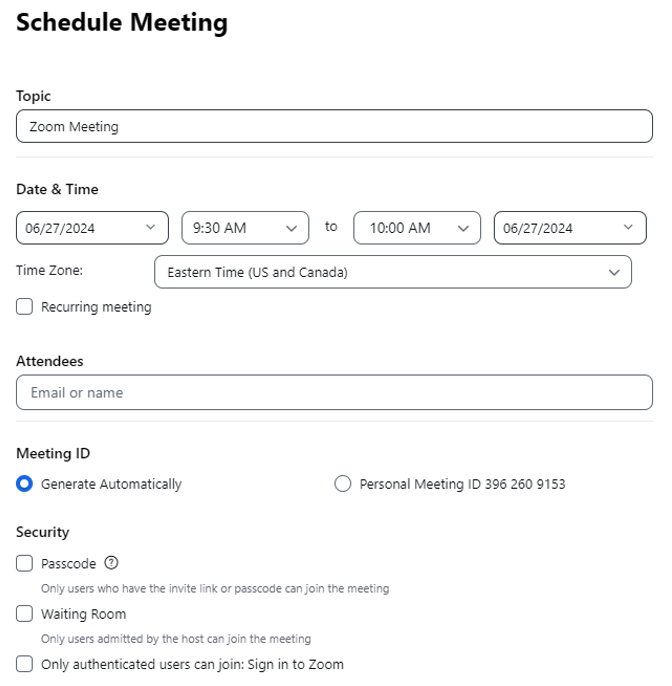
- “Generate Automatically” Meeting ID – the most secure way to ensure a Zoom meeting is used as intended is to create a unique ID for a scheduled meeting. This is required for HIPAA compliance.
Using a personal meeting ID is not recommended. If this option is used, the meeting password and waiting room features should be enabled, and guests should not be allowed to join before the host to prevent any use of Zoom without the account owner’s knowledge. - Meeting Passcode—A password is recommended for all meetings to prevent anyone who was not explicitly invited from joining. The Zoom meeting invitation includes the password, which will remain activated for future meetings unless turned off. See Zoom Meeting Passcodes for more information about meeting passcodes and how to use this feature.
- Waiting Room – enable this virtual staging area to gather participants until the host officially starts the meeting. The Waiting Room option is a helpful way to screen participants and identify unwanted guests before sharing any information. (See this video for more information on Zoom’s Waiting Room.) Meeting hosts must enable the Waiting Room under Advanced Options – click here for instructions. Waiting Room settings can also be customized for additional control and communication with guests, including adding a personalized message so attendees know they’re in the right spot or receive instructions regarding the session. See the Zoom Waiting Room for more information and instructions on setting up this feature.
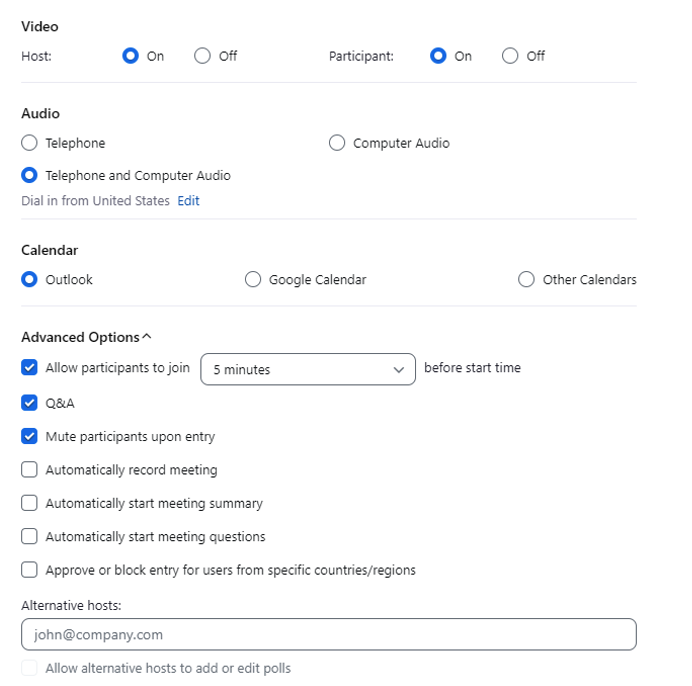
- File Transfer – Zoom’s default Chat setting allows participants to transfer files through the in-meeting chat window. Go into Advanced Settings and disable the File Transfer feature or only allow a specified type of file if necessary for your attendees or topic.

- Annotation – participants are, by default, able to make notations on a shared screen during a meeting. Go into Advanced Settings and disable the Annotation feature.

During the Meeting
When the meeting begins, there are several options to limit screen sharing and manage participants to avoid disruptions.
- Sharing Screens: the meeting host can determine who is able to share their screen during the meeting. To prevent disruptions, use the Advanced Sharing Options in the toolbar’s Share Screen menu:

Select One participant can share at a time and Host Only to maintain the most control over what is presented to attendees.
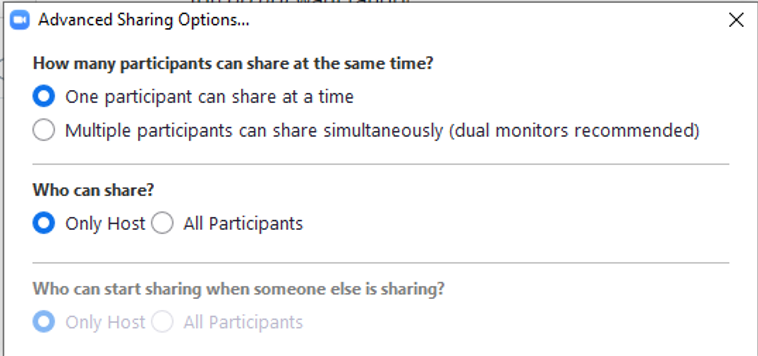
With this setting, the host can grant sharing permissions to other participants during the meeting.
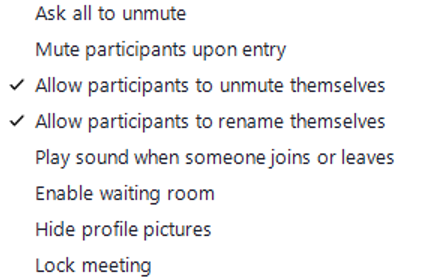
- Mute Participants – Hosts can mute participants to eliminate unwanted, distracting, or inappropriate noise. Click Participants in the Zoom meeting toolbar then click the ellipses (three dots) to display the options.

Enable Mute Participants Upon Entry to eliminate background noise. This setting can be changed during the meeting, or participants can be instructed to unmute themselves through the toolbar menu or by pressing *6 on their phones.
- Lock Meeting – the host can prevent additional participants from joining the meeting once it’s begun. (This will affect invitees who arrive late from joining.) Click Participants in the Zoom meeting toolbar then click More and select Lock Meeting.
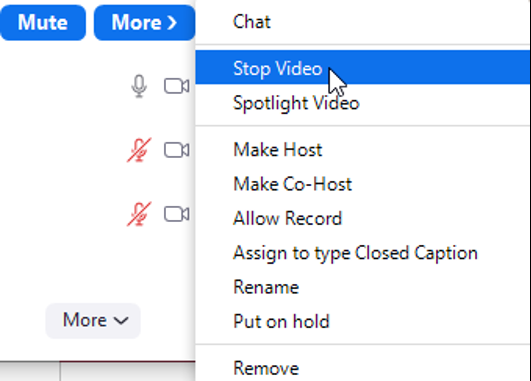
- Manage a specific Participant – the host can use the Participants list to address an individual attendee during the meeting. Hover the mouse over the participant’s name and click Mute or click More to Stop Video (turn off the person’s video in Zoom), Put on Hold (turn off their video and audio connection – can be taken off hold), or Remove (expel them from the meeting and they cannot re-join).
- Remote Control – during a meeting, the participant sharing their screen can allow others to control the content. This feature can be disabled in the Advanced Settings by turning off Remote control.
In Case of Disruption
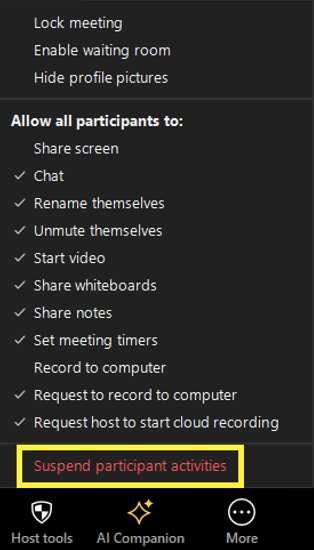
Suspend Participant Activities—If you are the target of Zoombombing or other disruptive activities in your meeting, the host or Co-Host should click on the Host tools at the bottom of the screen, then click Suspend participant activities.
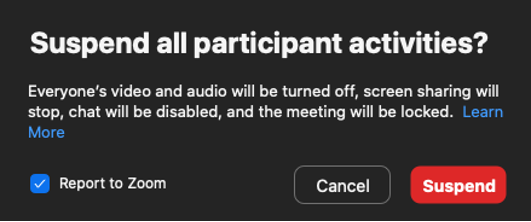
Once suspended, all the options below are disabled until you re-enable them manually.
- All video
- All Audio
- In-Meeting Chat
- Annotation
- Screen Sharing
- Recording during that time
- Breakout rooms will close
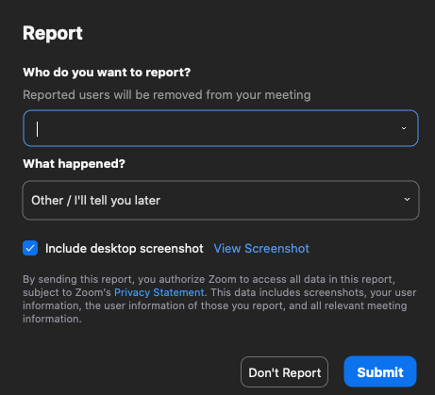
You will have the option to drop down and select the offending user, who will then be removed from your meeting. Once the report is submitted, the Host or Co-host can re-enable video, audio, recording, etc. manually.
After the Meeting
