Page Contents
Overview
Use this reference guide when registering from a saved schedule AFTER the registration window is open. If you have not created a saved schedule, follow the instructions in How to Prepare a Schedule Before Open Registration.
Register from a Saved Schedule
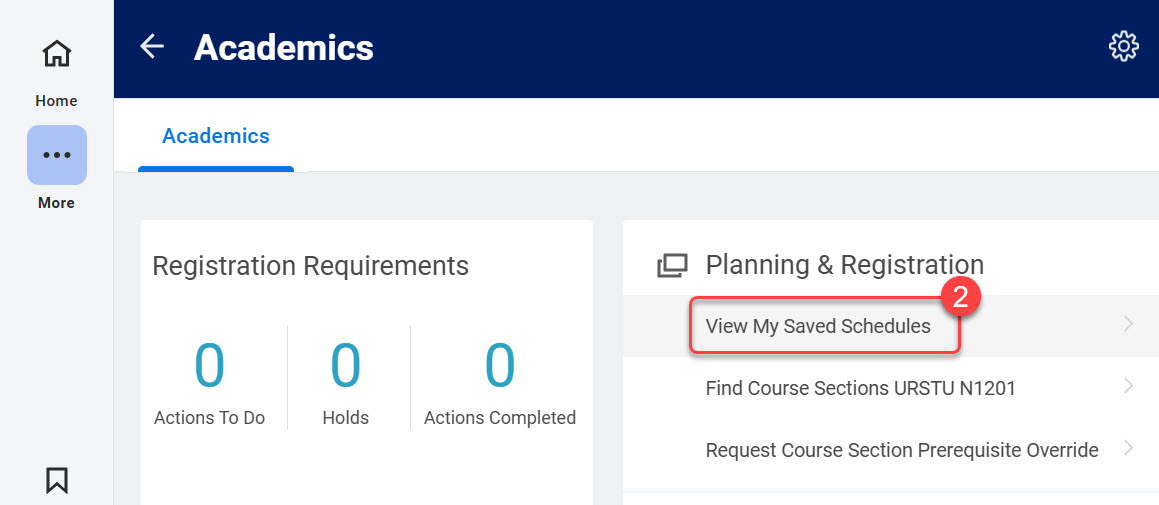
- When the academic registration window is open for your school, log into UR Student, then navigate to the Academics app under UR Student in the global menu.
TIP: If you cannot see UR Student in the global menu, select the More icon. - Under the Planning & Registration area, select View My Saved Schedules.
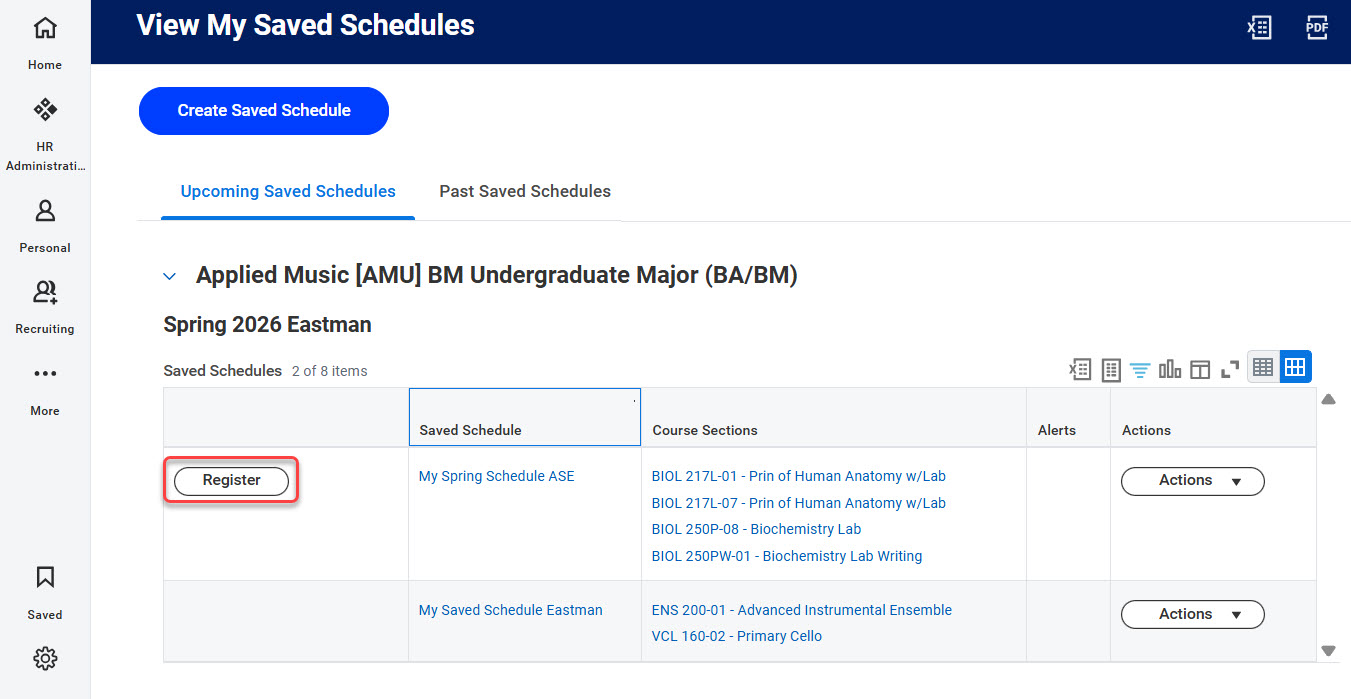
- Under the Upcoming Saved Schedules tab, select the Register button on the row containing the saved schedule for which you wish to register.
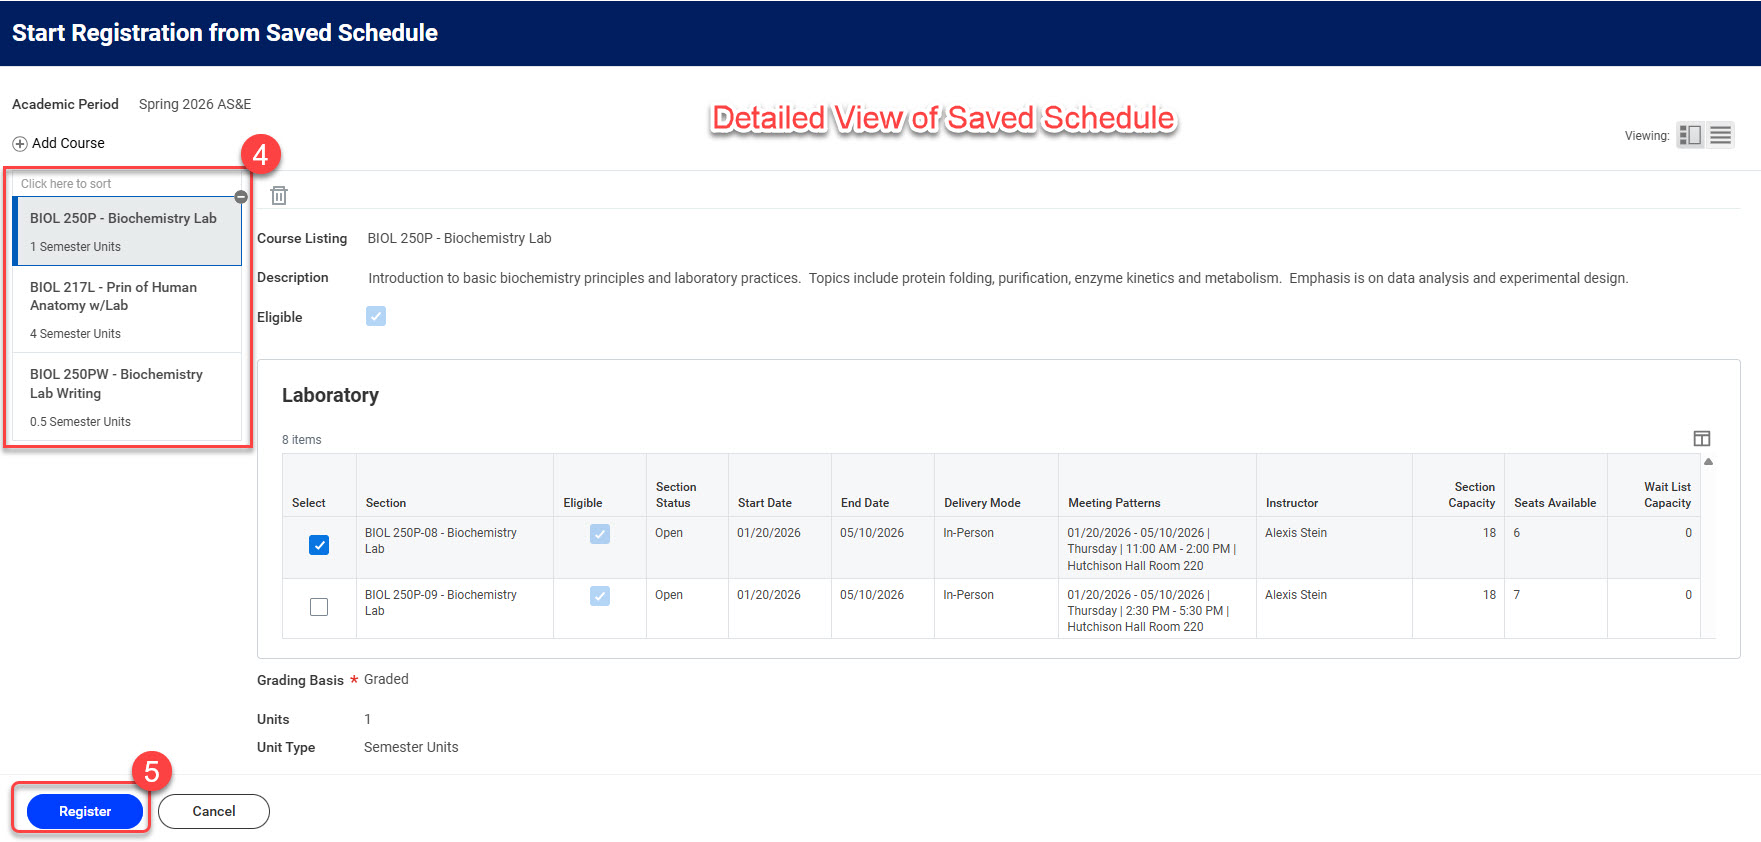
- Review your course list to ensure you have selected the appropriate course sections, grading basis (if applicable), and units (if applicable). Select each course in the left-hand list to view the course details or select on the “list view” icon next to Viewing in the top right.
- Once you are satisfied with your course selections, select Register.
- You will receive a checkmark and a list view of your “Successful Registrations” in a table titled “Registered Courses” upon selecting the Register button.
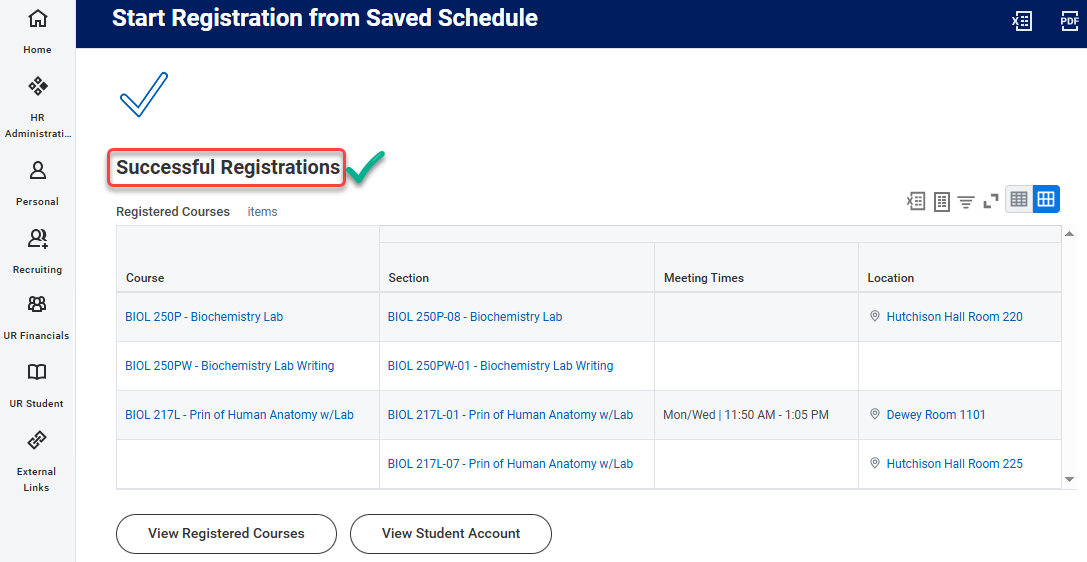
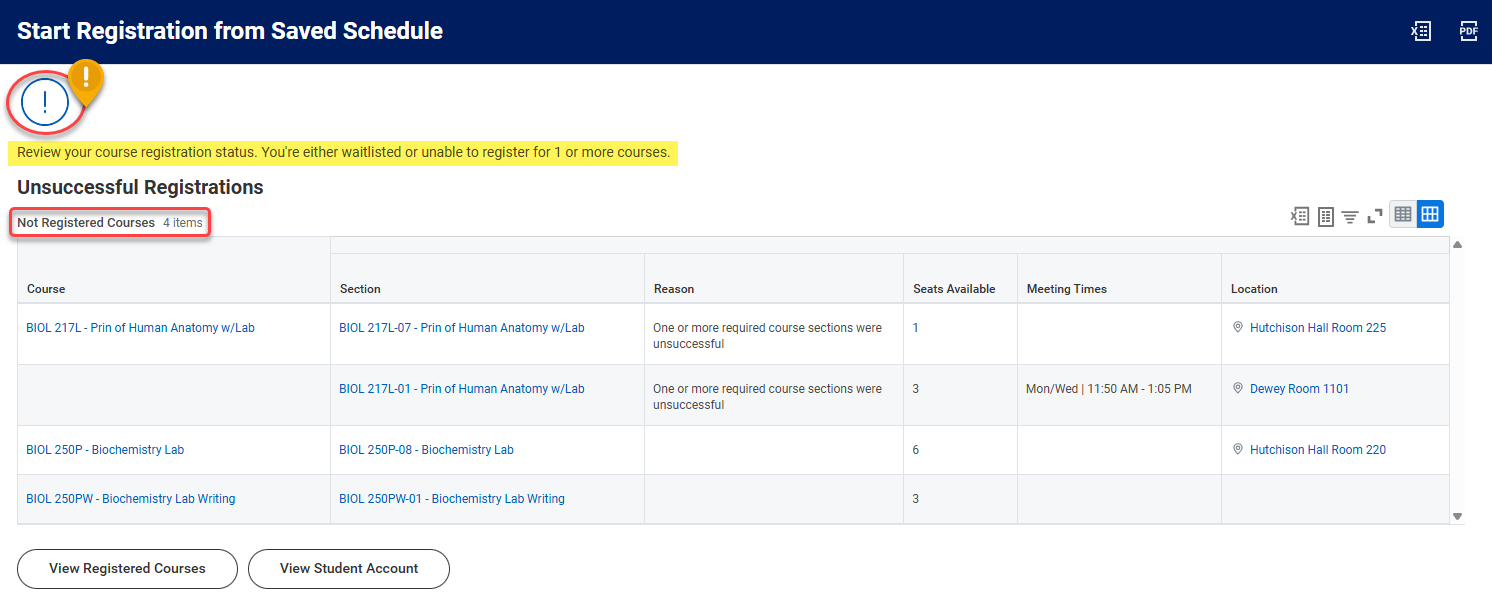
If there are any courses for which you were not registered after selecting the Register button, those courses will be listed in a table titled “Not Registered Courses.” View the Reason column to determine why.
![]()
TIPS:
- If you need to edit the course selection in your Saved Schedule, please follow the directions outlined in How to Prepare a Schedule Before Open Registration.
- If you cannot register from your saved schedule, see Troubleshoot Registration for a Course.
Verify You have Registered for a Course(s)
- Log into UR Student if you have not already done so.
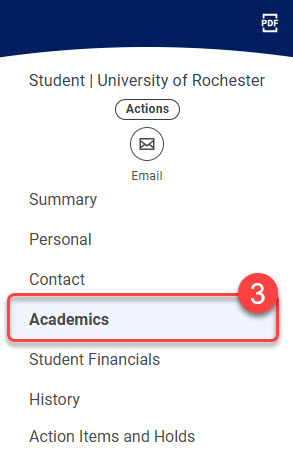
- Navigate to your Student Profile by selecting your picture, or the person icon, then select View Profile.
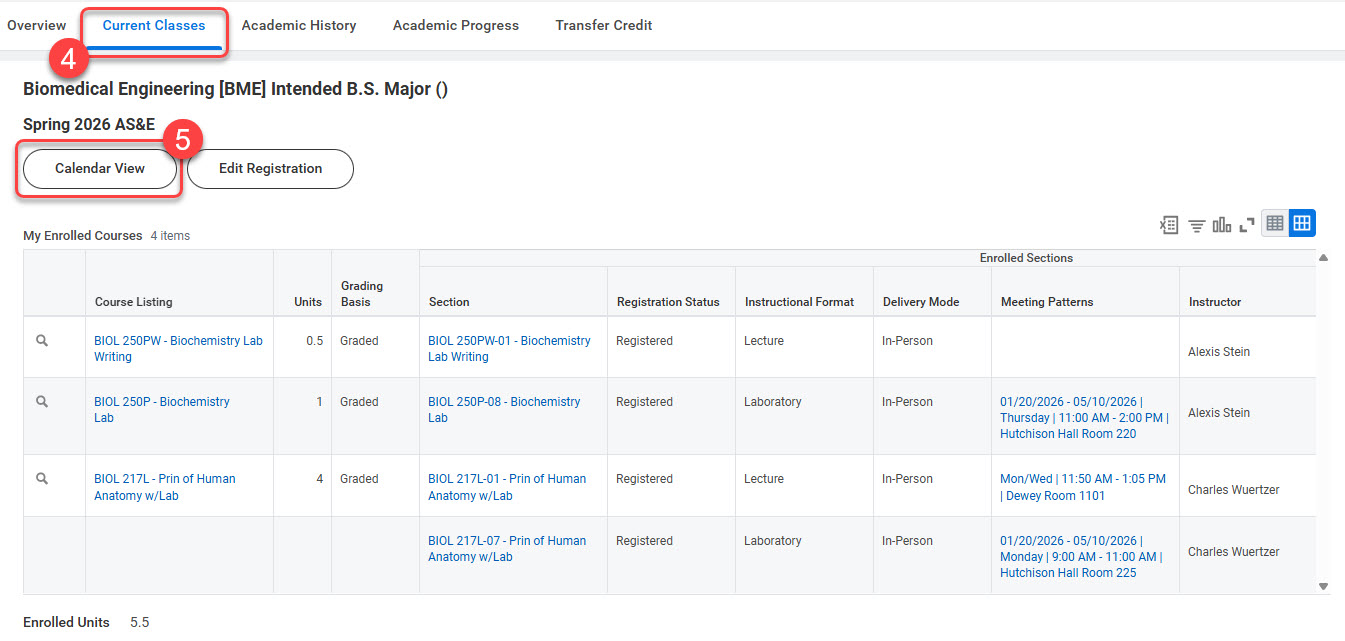
- Select Academics in the left navigation area.
- Select Current Classes to see all registered classes by academic term.
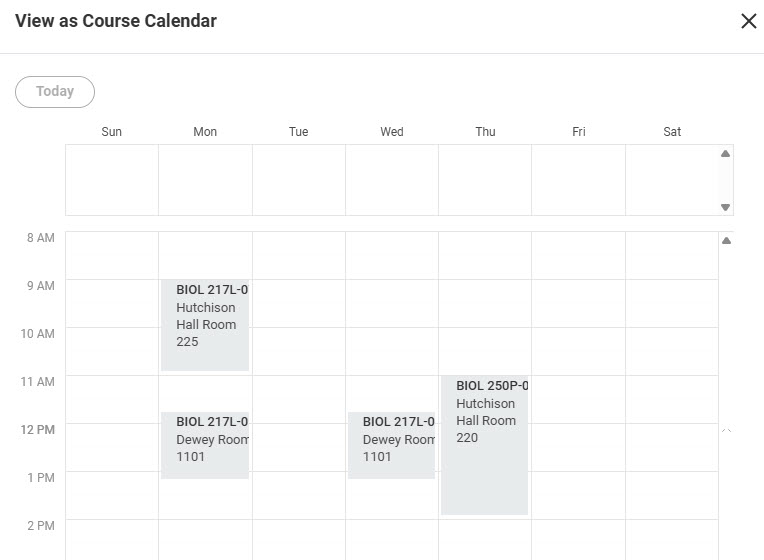
- Select Calendar View to see classes in a weekly grid view.

TIP: The Edit Registration button allows you to edit criteria for your registered classes such as Units and Grading Basis (if applicable) only. To change your courses, please follow the instructions in either How to Drop a Course or How to Swap a Course.